High Altitude Jet Installation (2,800+ Watt Inverters)
![]() Updated
by
Juan Velez
Updated
by
Juan Velez
180906-60-30-1
This covers the following models: 2,800 to 3,500 watt portable inverters. The unit pictured is a 3,100 watt dual fuel unit. The process overall is the same across remote start, manual start, and dual fuel units.
Read all directions completely and carefully before performing the service.
- Remove the left panel on the inverter.
Visual
See below.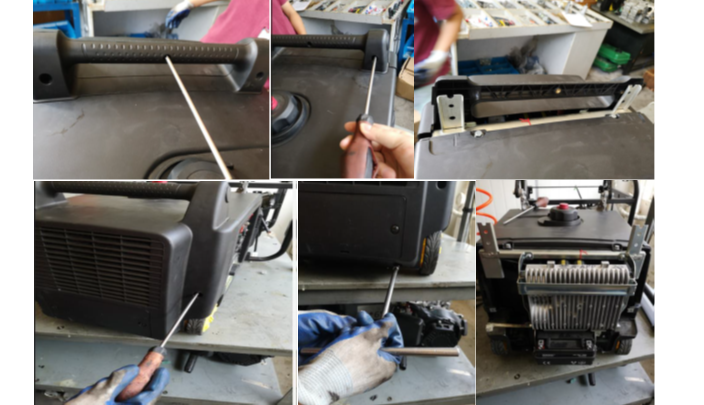
- Remove the maintenance panel.
Visual
See below.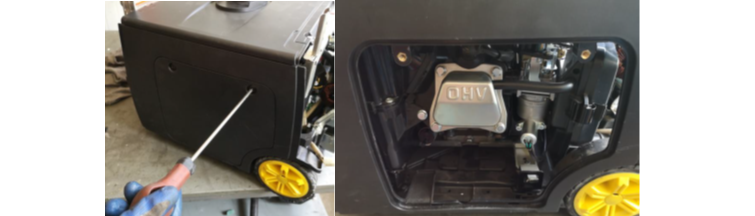
- Rotate the fuel switch to the "OFF" position on the operating panel. Drain the residual fuel in the float chamber bowl.
Visual
See below.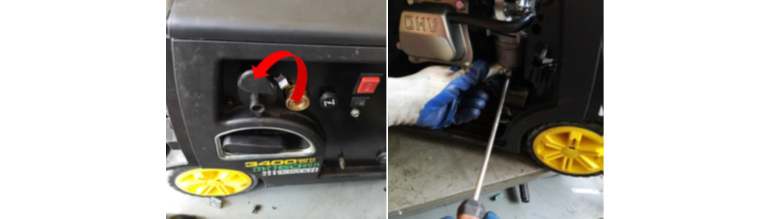
- Open the air cleaner cover and take out the paper filter, and then use a 10 mm box end wrench to remove the air cleaner nuts, so the air cleaner base is loose from the carburetor.
Visual
See below.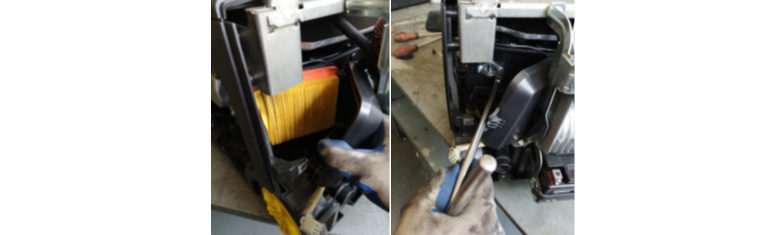
- Pull out the breather hose from the air cleaner base, take the air cleaner base out from the mounting rods, and move the carburetor slightly outward to leave more operating space.
Visual
See below.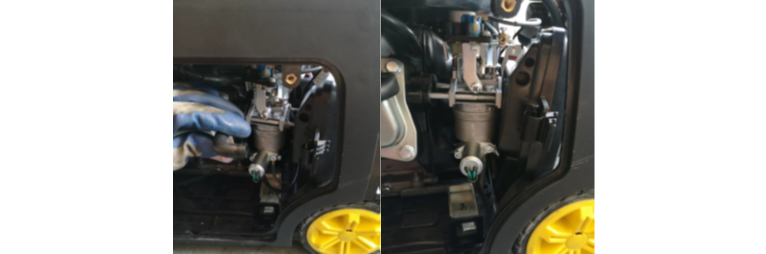
- Using a 10 mm box end wrench, remove the float chamber bolt (clockwise). Do not lose or misplace the O-rings for the float chamber or bolt.
Visual
See below.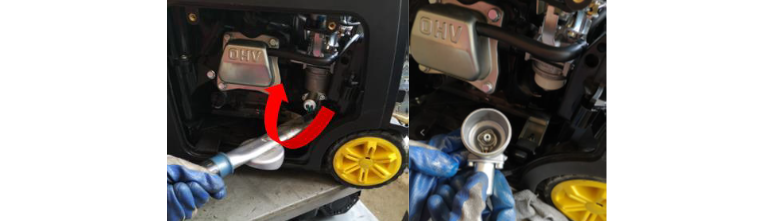
- With the float bowl removed, place a short flat head screwdriver straight into the center shaft of the carburetor. Turn your screwdriver slowly until you feel it catch.
Visual
See below.
- Unscrew the jet (counterclockwise), standard threading. Gently tap out the loosened standard jet. You do not need to replace the main nozzle. If the main nozzle comes out, simply reinsert it back into the carburetor's shaft before inserting the altitude jet.
Visual
See below.
- Insert the high altitude jet and hand tighten it using your screwdriver.
- before you put the float bowl back on, make sure the rubber o-rings are seated properly. Replace the float bowl on the carburetor. Be sure the drain screw and hose are facing towards when securing the bowl.
Visual
See below.
- Reinstall the carburetor and the air cleaner base and ensure tightened; put the paper filter back into the air cleaner.
- Replace the cover on the left panel.View and download the PDF version here.
Visual
See below.