Storage Recommendations
![]() Updated
by
Juan Velez
Updated
by
Juan Velez
190416-140-10-1
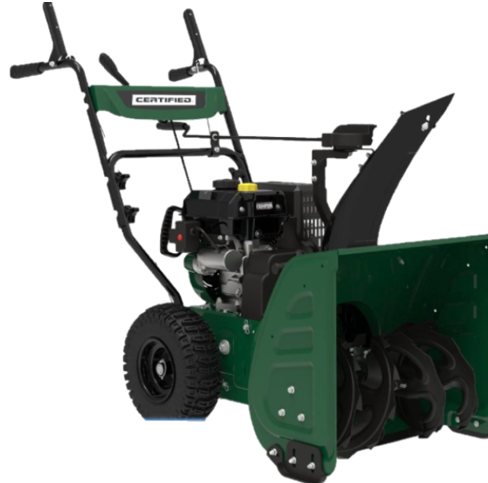
This bulletin covers the following models: 060-3732-6 [100435], 060-3740-6 [100566], 060-3742-2* [100567*], 060-3744-8* [100568*] - Certified 22”, 24”, 27” & 30” Snow Blowers.
To avoid severe injury or property damage, use high levels of care while handling gasoline. Gasoline is an extremely flammable substance and the vapors are explosive. Serious personal injury can occur when gasoline is spilled on yourself or your clothes, which can ignite. If you come into contact with gasoline, wash affected areas of skin and change clothing immediately.
- To reduce the risk of injury, the user must read and understand the operator's manual before using this product.
- DO NOT make any adjustments to the snowblower without first stopping the engine, removing the engine key, and disconnecting the spark plug wire.
- Burns from hot parts - let the engine cool for 30 minutes before touching hot parts.
- Injury from moving parts - this machine may pick up and throw objects which can cause serious personal injury. Keep bystanders at a safe distance.
- To reduce the possibility of fire or explosion, be careful when working around gasoline. Keep cigarettes, sparks, and flames away from all fuel-related parts.
- DO NOT run the engine with the belt guard removed.
Long-Term Storage
Tools Required:
Tool | Size |
Rachet and Extension | 3/8” Drive |
Spark Plug Socket | 21mm – 13/16” |
Sockets | 10mm, 12mm |
Wrench | 10mm, 12mm, 13mm |
Oil | 0W30 |
Oil Drain Pan and Funnel |
|
Disposable Vinyl/Nitrile Gloves |
|
Never store the machine with gasoline in the fuel tank in a confined area with improper ventilation. Gasoline fumes could reach open flames, sparks, cigarettes, etc.
To avoid the engine from locking up and problems starting the engine the next time you use it, remove any snow on the unit and leave the engine running for 5-1 minutes after your work has been completed. This will ensure all moisture will disappear that would otherwise cause starting problems. If the machine is to be stored for a longer period than 30 days, the following procedures are recommended.
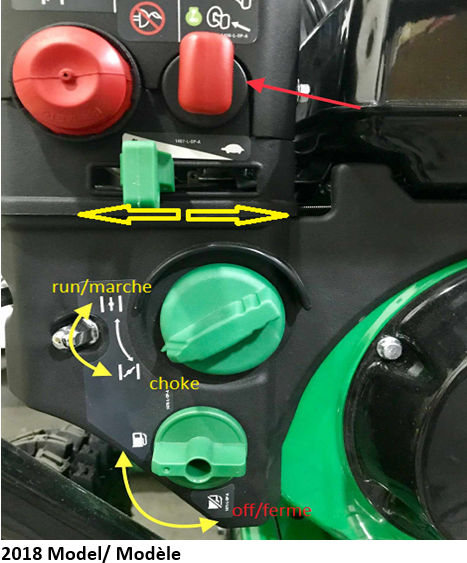
- Start the engine in a well-ventilated area outdoors and after a few minutes of running. Shut the fuel valve off and allow the engine to run until fuel starvation (approximately 1-2 minutes). Drain any remaining fuel before storage.
Visual
See below.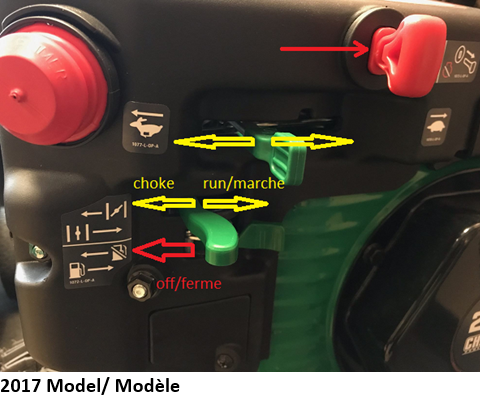
- Once the engine comes to a stop, remove the ignition key. We suggest you zip tie this to the recoil handle assembly. This will ensure no one starts the engine while you are working on it and will also be in a place you can find it next season. (That is the spot you want to put it in, so you do not lose it.)
Visual
See below.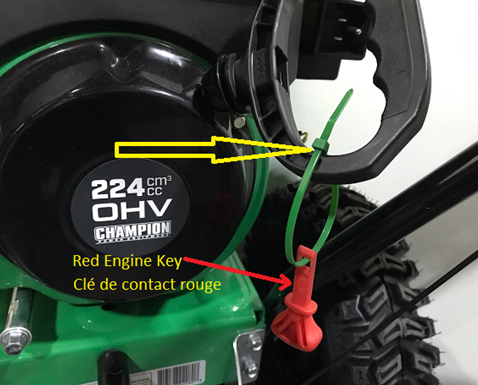
- 2017 Model: While the engine is still warm, drain the oil. Warm oil drains quickly and completely. Hold the drain tube with a 13 mm wrench; loosen the drain bolt with a 12 mm wrench or sock and drain the oil into the catch pan. After oil has drained, inspect the drain bolt sealing washer and tighten the drain bolt. [Torque - 20 N-m (14.8 ft-lbs.)] With the engine in a leveled position, fill it to the upper limit mark on the dipstick with the recommended 0W-30 oil. Dispose of the used oil at a recycling center or service station for reclamation.
Visual
See below.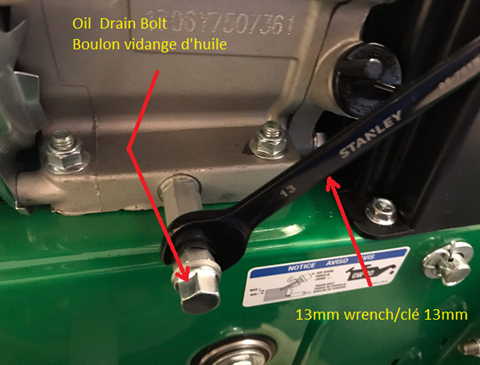
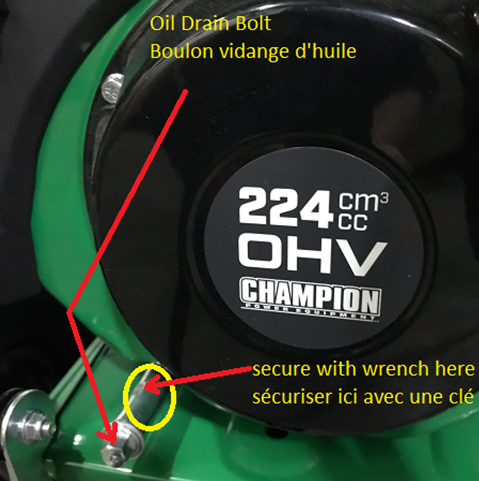
2018 Model: While the engine is still warm, drain the oil. Warm oil drains quickly and completely. The oil drain tube is located below the recoil assembly. Hold the drain tube with a 12 mm wrench and loosen the drain bolt with a 10 mm wrench or socket, and drain the oil into a catch pan. After the oil has drained, inspect the drain bolt sealing washer and tighten the drain bolt. [Torque 20 N-m (14.8 ft-lbs.)] With the engine in a leveled position, fill it to the upper limit mark on the dipstick with the recommend 0W-30 oil. Dispose of the used oil at a recycling center or service station for reclamation.
Visual
- Remove the three bolts holding the spark plug cover plate with a 10 mm socket.
Visual
See below.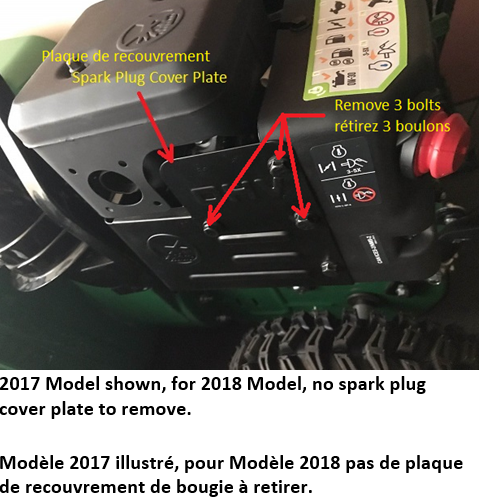
- Gently pull the spark plug wire by firmly grasping the spark plug insulator at the base.
Visual
See below.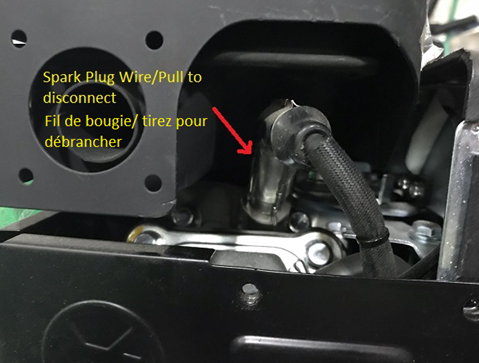
- Remove the spark plug with a 21 mm (13/16") deep socket spark plug socket.
Visual
See below.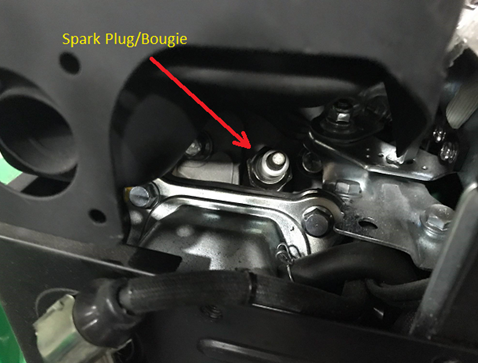
- After removing the spark plug, pour 15 ml/.5 oz. of oil into the cylinder.
Visual
See below.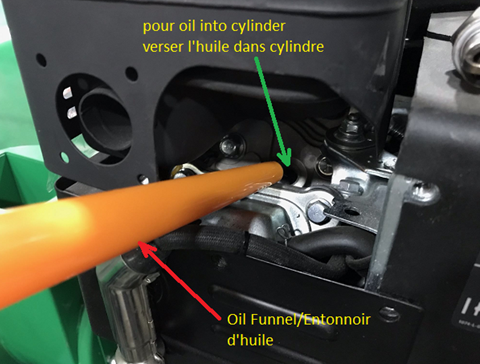
- Crank the engine slowly to distribute the oil and lubricate the cylinder.
Visual
See below.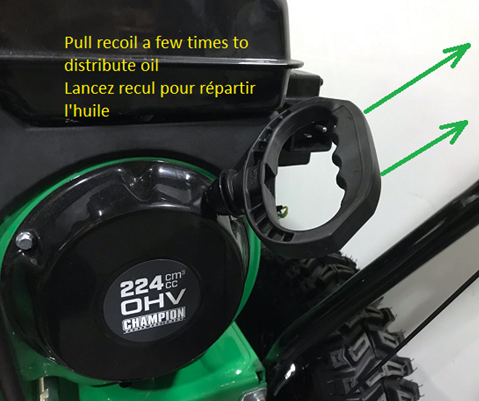
- Install a new spark plug and reattach the spark plug boot and cover plate. [Torque Spark plug/Bougie: 20-30 N-m (14.8-22.1 ft-lbs.)]
Visual
See below.
- Clean the whole machine thoroughly and lubricate all the parts as stated in the "Lubrication" section of the owner's manual. Refer to the "Maintenance" section for all other service procedures. Never store your snow blower with gasoline in the gas tank over the season when not in use.
Visual
See below.