Certified Snow Blower Cable Assembly
![]() Updated
by
Juan Velez
Updated
by
Juan Velez
190219-140-50-1
This bulletin covers the following models: 100435 (060-3732-6) 22", 100566 (060-3740-6) 24", 100567 (060-3742-2) 27", and 100568 (060-3744-8) 30."
- To reduce the risk of injury, the user must read and understand the operator's manual before using this product.
- DO NOT make any adjustments to the snowblower without first stopping the engine, removing the engine key, and disconnecting the spark plug wire.
- Burns from hot parts - let the engine cool for 30 minutes before touching hot parts.
- Injury from moving parts - this machine may pick up and throw objects which can cause serious personal injury. Keep bystanders at a safe distance.
- To reduce the possibility of fire or explosion, be careful when working around gasoline. Keep cigarettes, sparks, and flames away from all fuel-related parts.
- DO NOT run the engine with the belt guard removed.
- NOTICE: Cables are disconnected from the control handles and found near to the belt guard cover in the front of the tank.
Visual
See below.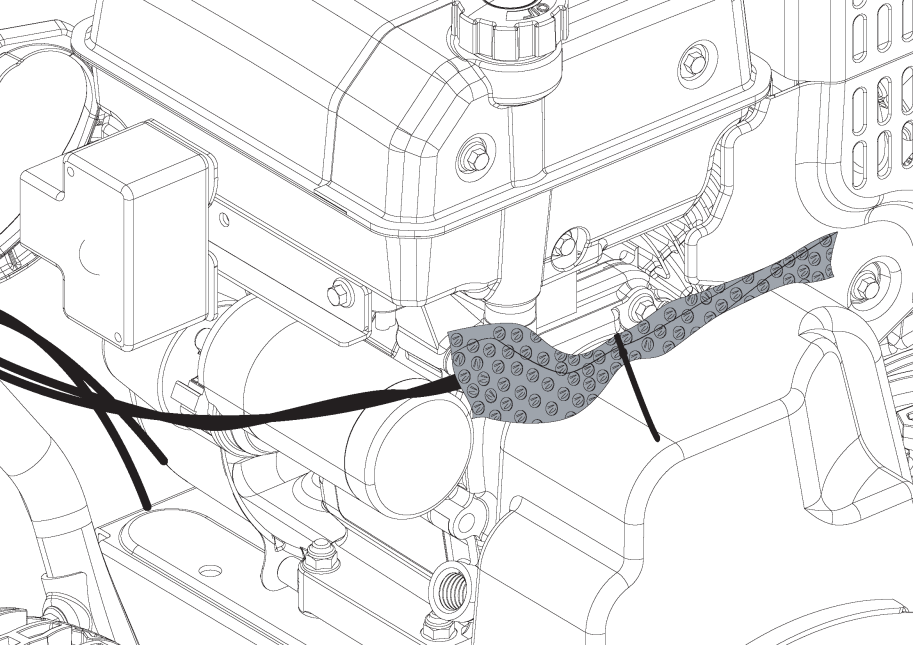
- Remove the bubble wrap and cable assembly. The ends will look as shown below.
Visual
See below.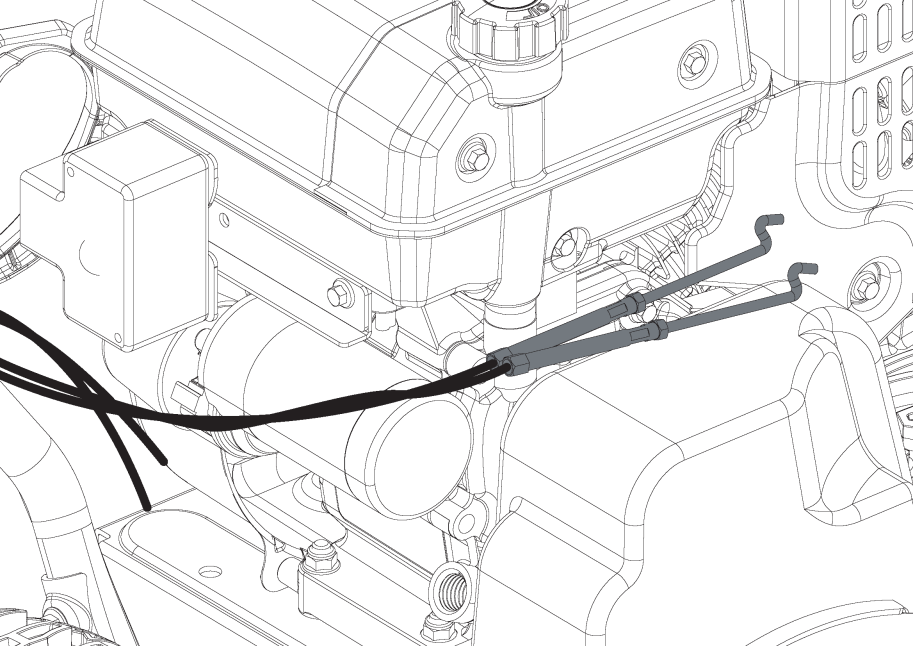
- The control wires include part A and part B. These parts will separate for the assembly in the next steps. Unscrew part A and B of the wire.
Visual
See below.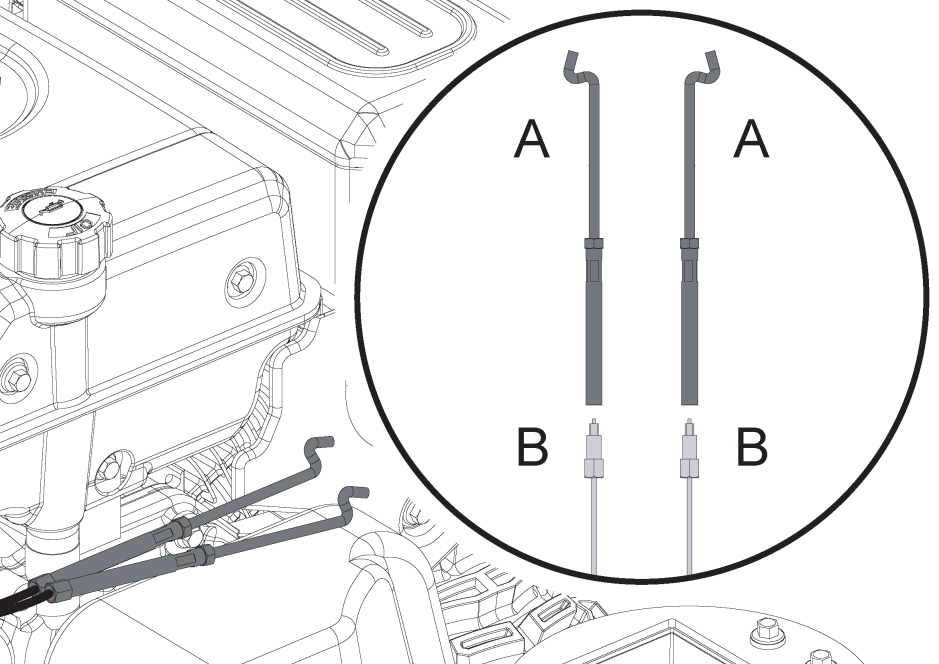
- Place the drive control connector into the right handle as shown. This will be the cable that comes from the right side of the unit.
Visual
See below.
- Lift the control handle as shown.
Visual
See below.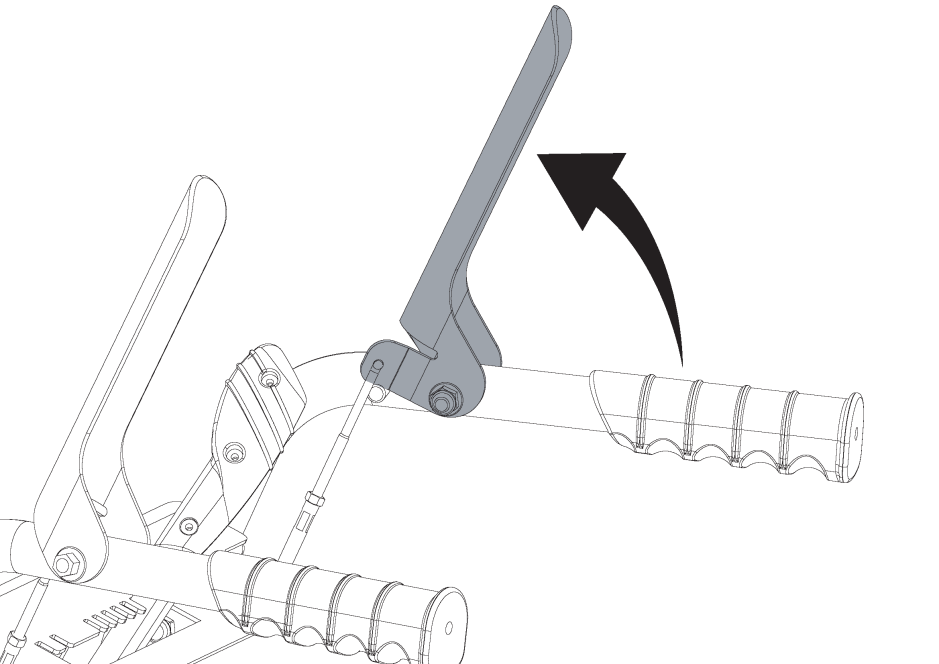
- Screw part B to part A and tighten completely. See ADJUSTING SELF-DRIVE CONTROL HANDLE CABLE in your manual for correct adjustments.
Visual
See below.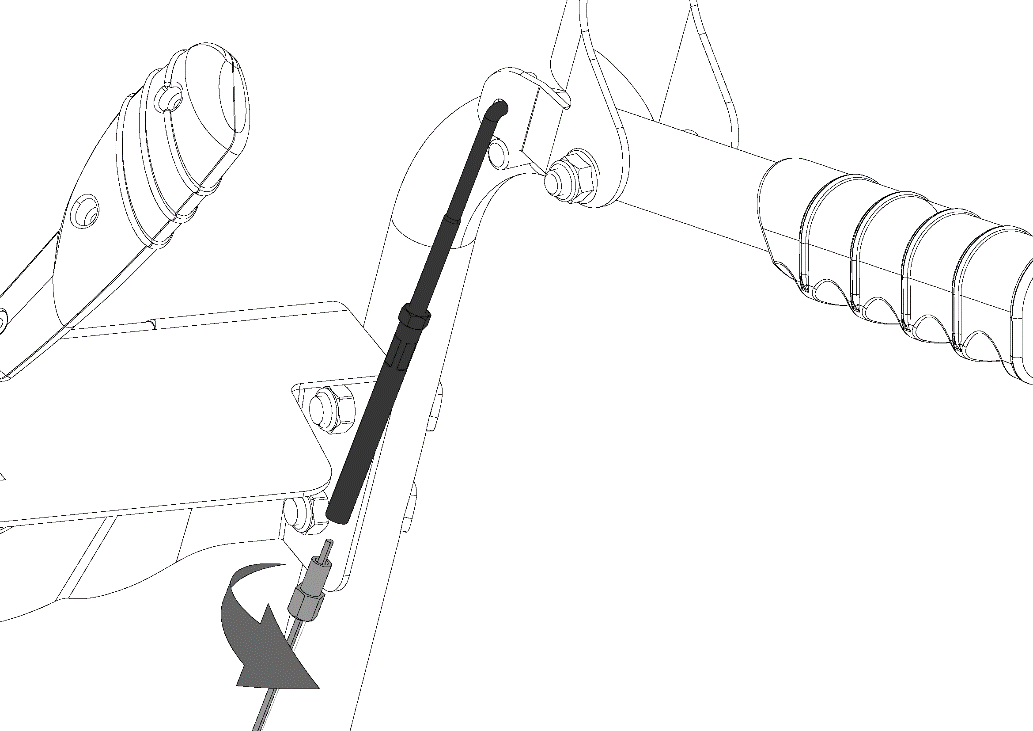
- Repeat this for the auger cable on the left side.
- The cable will be located on the left side of the snow blower.
Adjusting the Drive Control Handle Cable
Make sure that the tension on the self-drive cable is adjusted, so it has between 1/4-3/8" (6.4-9.5 mm) of movement. This movement can be acquired b measuring the distance the engagement paddle moves from its starting position and the point it becomes taut and starts to move the transmission adjustment lever. If the slack is greater that 5/8" (16 mm), please adjust. Proper tension is important because you will want your snow blower to move forward properly in heavy snowfalls.
Visual
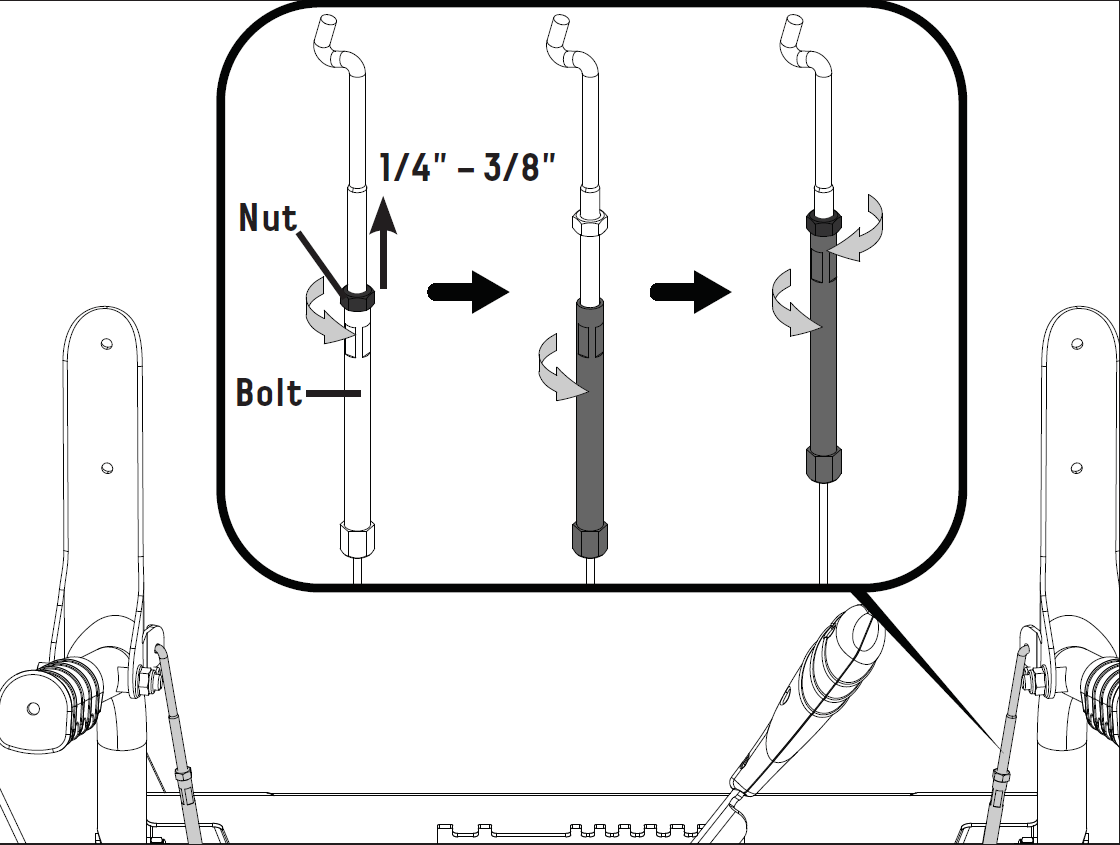
While operating the snow blower, if the drive control lever is too loose, tighten the nut counter-clockwise while at the same time rotating the bolt upward to reach the position of the nut.
Adjusting the Auger Control Cable
Make sure that the tension on the auger control cable is adjusted so it has between 1/4-3/8" (6.4-9.5 mm) of movement. This movement can be acquired by measuring the distance the engagement paddle moves from its starting position and the point it becomes taut and starts to engage the auger. If the slack is greater than 5/8" (16 mm), please adjust. Proper tension is important because you will want your snow blower to maximize belt life in heavy snowfalls.
Visual
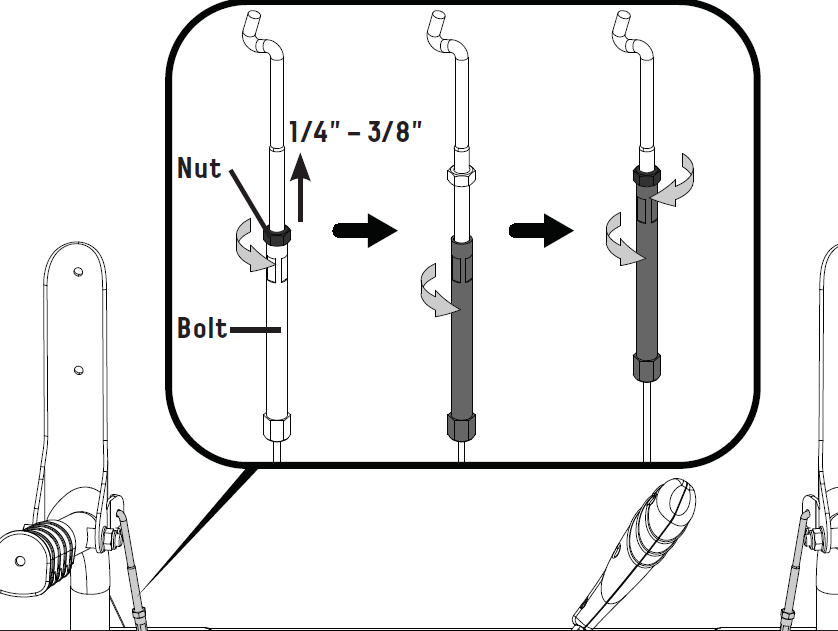
While operating the snow blower, if the auger control lever is too loose, tighten the nut counterclockwise while at the same time rotating the bolt upward to reach the position of the nut.
View and download the PDF version here.