23cc Handheld Leaf Blower Gas Tank Replacement
![]() Updated
by
Juan Velez
Updated
by
Juan Velez
This article covers the following models: 100734.
Please read and view the instructions carefully and completely before performing the service.
SAFETY PRECAUTIONS
- To reduce the risk of injury, user must read and understand the operator’s manual before using this product.
- DO NOT make any adjustments to leaf blower without first stopping the engine, making sure that all moving parts have stopped and disconnecting the spark plug wire.
- Burns from hot parts — let the product cool for 30 minutes before touching hot parts.
- Injury from moving parts.
- To reduce the possibility of fire or explosion, be careful when working around gasoline. Keep cigarettes, sparks, and flames away from all fuel‐related part.
Tools Required
Tool | Size |
Phillips Screwdriver | #2 |
Hex Bit | 4 mm or 5/32" |
- Use 23cc Handheld Leaf Blower Carburetor and Gasket Replacement technical bulletin prior to following this procedure for replacing the gas tank using this article.
- Remove the five Phillips screws where indicated and remove the starter housing.
Visual
See below.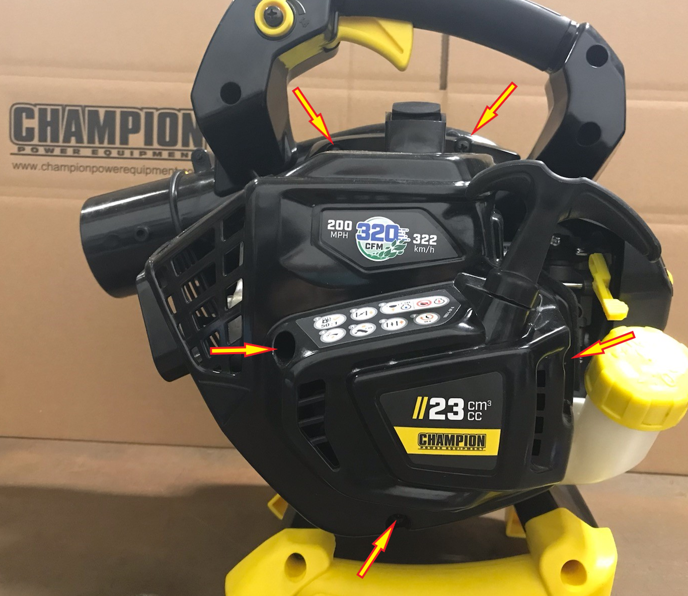
- Here is the unit with the starter housing removed.
Visual
See below.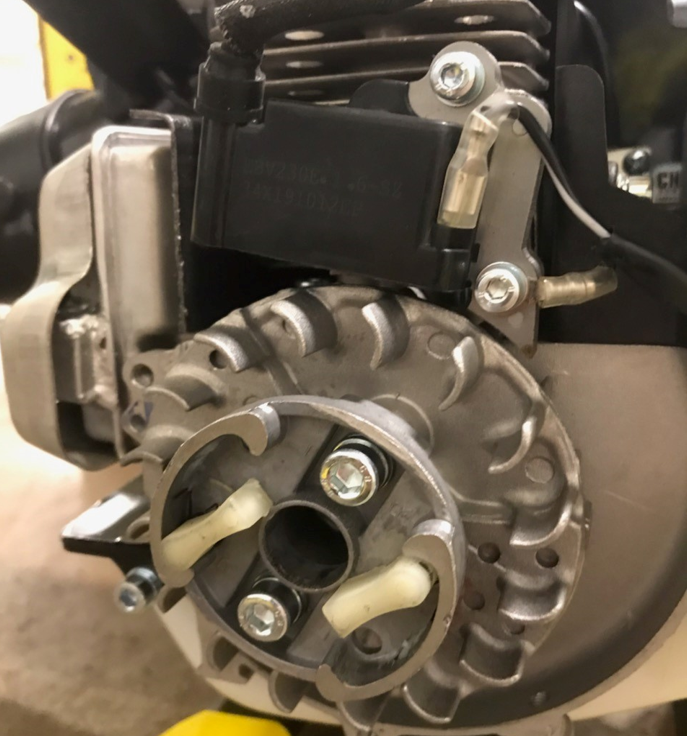
- Remove the five Phillips screws. One screw is found where the carburetor is; the other two under the unit; and the remaining two in the frame as shown.
Visual
See below.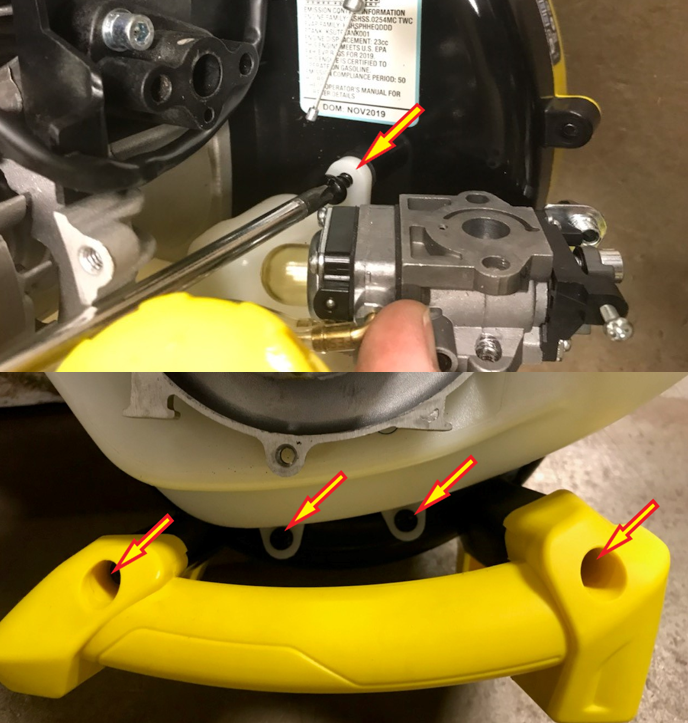
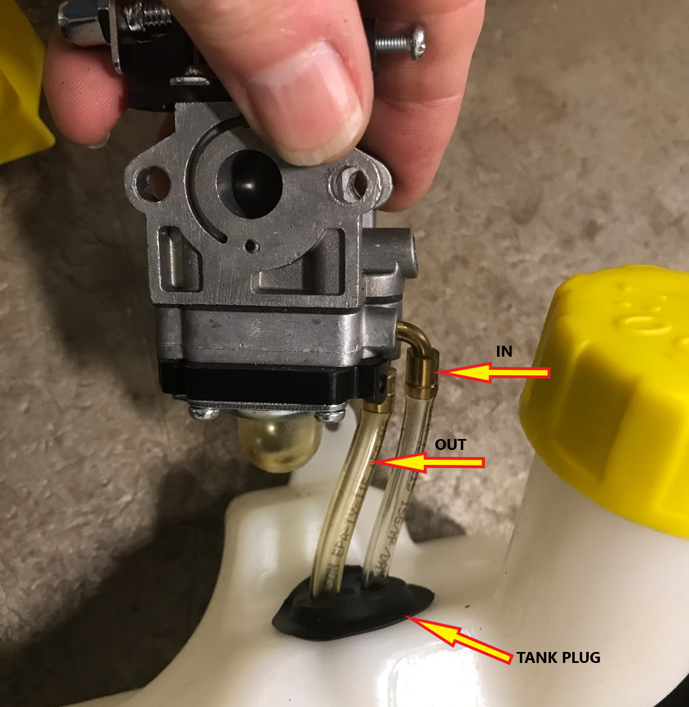
- Firmly grasp the gas tank and slide out as shown. Remove the ‘IN’ and ‘OUT’ fuel pipes from the tank by gently pulling up on the black tank plug and transfer them over to the new tank.
Visual
See below.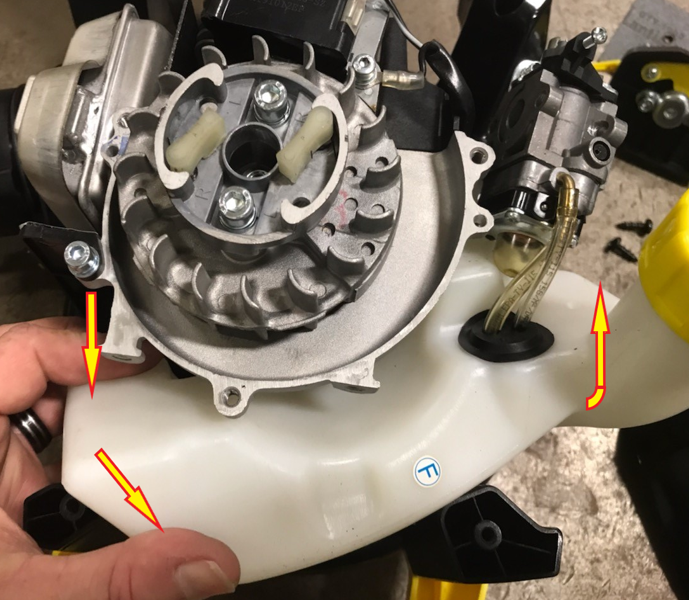
- This image shows the ‘IN’ and ‘OUT’ fuel pipes installed into the new tank plug and attached to a new gas tank. Reassemble the tank by following these instructions in reverse.
Visual
See below.