Cable Replacement and Adjustment
190706-160-20-1 This bulletin covers the following models: 100379 (22-Inch Front Tine Tiller) Please read the instructions carefully and completely before performing service. *Specifications, descrip…
Updated
by Juan Velez
190706-160-20-1
This bulletin covers the following models: 100379 (22-Inch Front Tine Tiller)
Please read the instructions carefully and completely before performing service.
*Specifications, descriptions, and illustrations are as accurate as known at the time of publication but are subject to change without notice.
SAFETY PRECAUTIONS
- To reduce the risk of injury, user must read and understand the operator’s manual before using this product.
- DO NOT make any adjustments to the tiller without first stopping the engine, making sure that all moving parts have stopped and disconnecting the spark plug wire.
- Burns from hot parts — let the engine cool for 30 minutes before touching hot parts.
- Injury from moving parts – make sure no other parts move while working on unit.
- To reduce the possibility of fire or explosion, be careful when working around gasoline. Keep cigarettes, sparks and flames away from all fuel‐related parts.
Tools Required
Wrench | 13 mm |
Ratchet | 1/4" drive |
Socket | 7 mm |
Needle Nose Pliers |
Never store the machine with gasoline in the fuel tank in a confined area with improper ventilation. Gasoline fumes could reach open flames, sparks, cigarettes, etc.
- Remove the five belt cover screws with a 7 mm socket. The bolt securing the front belt cover (#1) is the only one with a washer.
Visual
See below.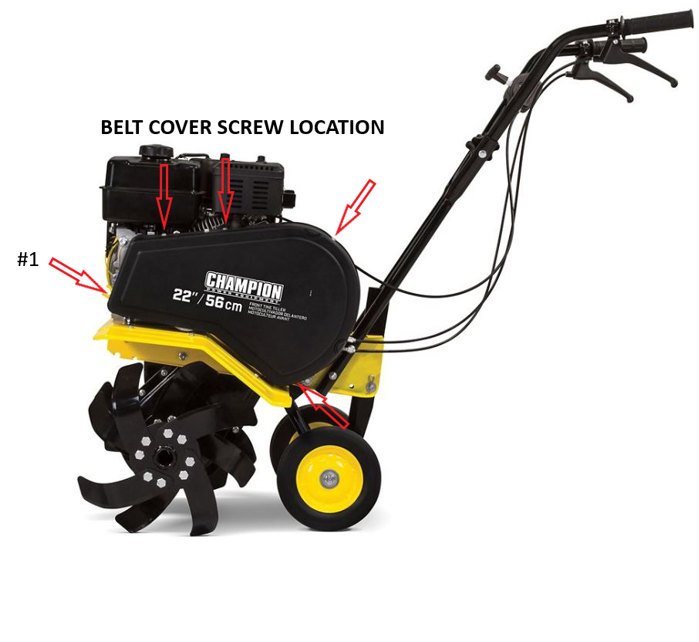
- Release the cable adjusting nuts with a 13 mm wrench by loosening the inner nut first.
Visual
See below.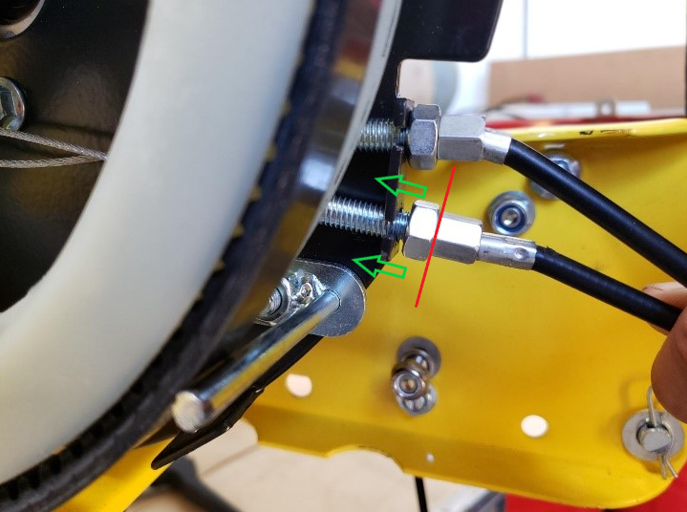
- Thread the outer nut all the way down to create maximum slack in the cable.
Visual
See below.
- Remove the cables from the forward and reverse control levers.
Visual
See below.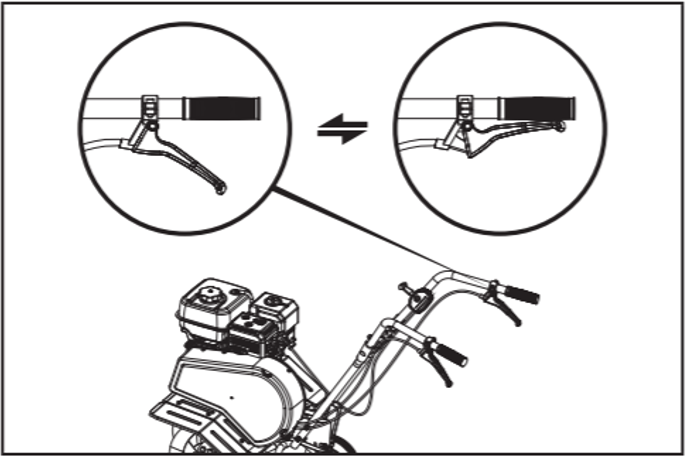
- Remove the reverse cable end hook from the tensioner arm.
Visual
See below.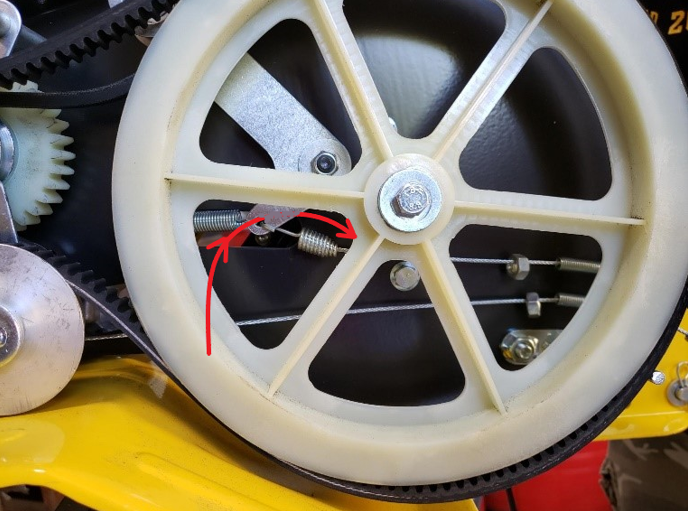
- Remove the forward tension cable from the tensioner arm.
Visual
See below.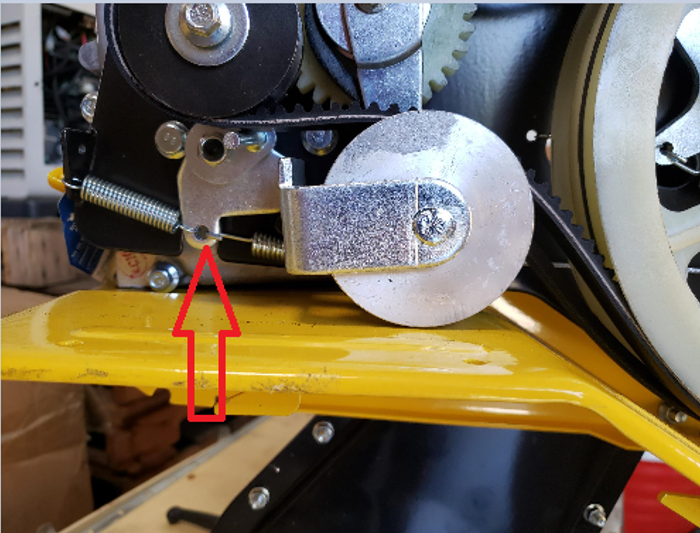
- Route the new cables and connect their ends to the tensioner arms. The cable with the longest wire (green arrow) exposed is the bottom cable controlling the forward engagement. When reaching through to install the cables, do not rotate the drive wheel or rotate the tines.
Visual
See below.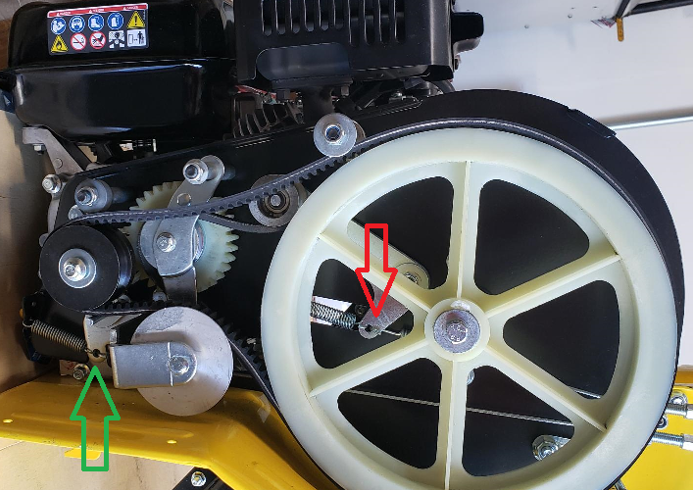
- Reinstall the forward cable in the left-hand lever and the other in the right-hand lever. Pull the cable adjuster out until slight tension is felt and hand tighten the adjustment nut.
Visual
See below.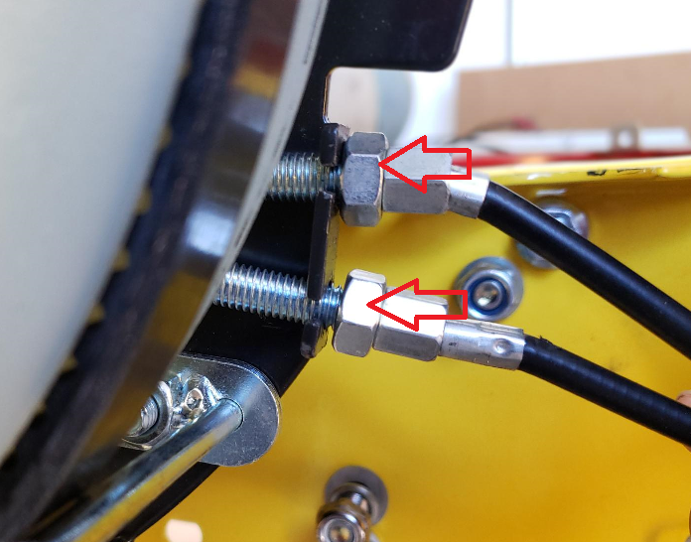
- Belt Tension Adjustment
Loosen the nuts holding the tine engagement cable to the tiller body. Move the cable away from the drive pulley to decrease belt tension, then re-tighten the nuts.
To Increase Belt Tension: Turn the jam nut clockwise in 1/8" (3 mm) increments. Test the travel distance of the engagement lever again to see if travel before full engagement is less that 5/8" of an inch. If it is still more than 5/8", readjust the cable.If there is no more cable adjustment left, the belt has become stretched and will need to be replaced.Visual
See below.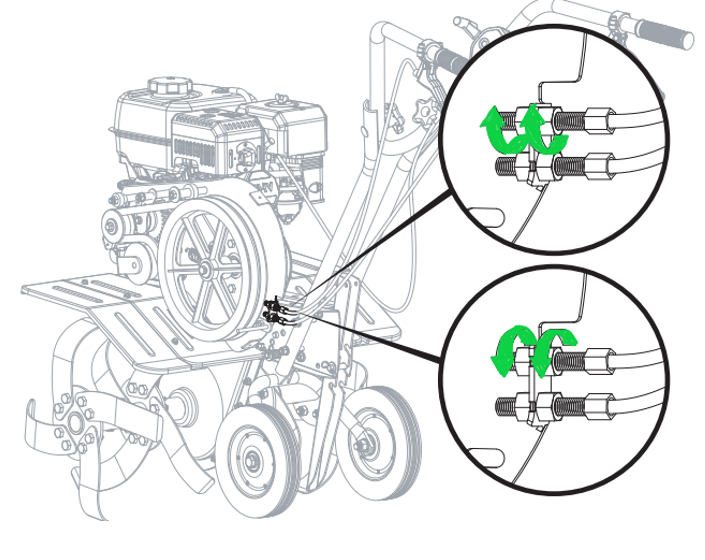
How did we do?
Drive Belt Replacement (100380)
Rear Tine Tiller Cable Adjustment