Snow Blower Troubleshooting
This bulletin covers the following models: All Champion Power Equipment snow blowers. Please read and view the instructions carefully and completely before performing the service. SAFETY PRECAUTIONS.…
This bulletin covers the following models: All Champion Power Equipment snow blowers.
- To reduce the risk of injury, user must read and understand the operator’s manual before using this product.
- DO NOT make any adjustments to the product without first stopping the engine and disconnecting the spark plug wire.
- Burns from hot parts — let the engine cool completely before touching hot parts.
- Injury from moving parts.
- To reduce the possibility of fire or explosion, be careful when working around gasoline. Keep cigarettes, sparks and flames away from all fuel‐related parts.
Augers or Drive Wheels not Turning
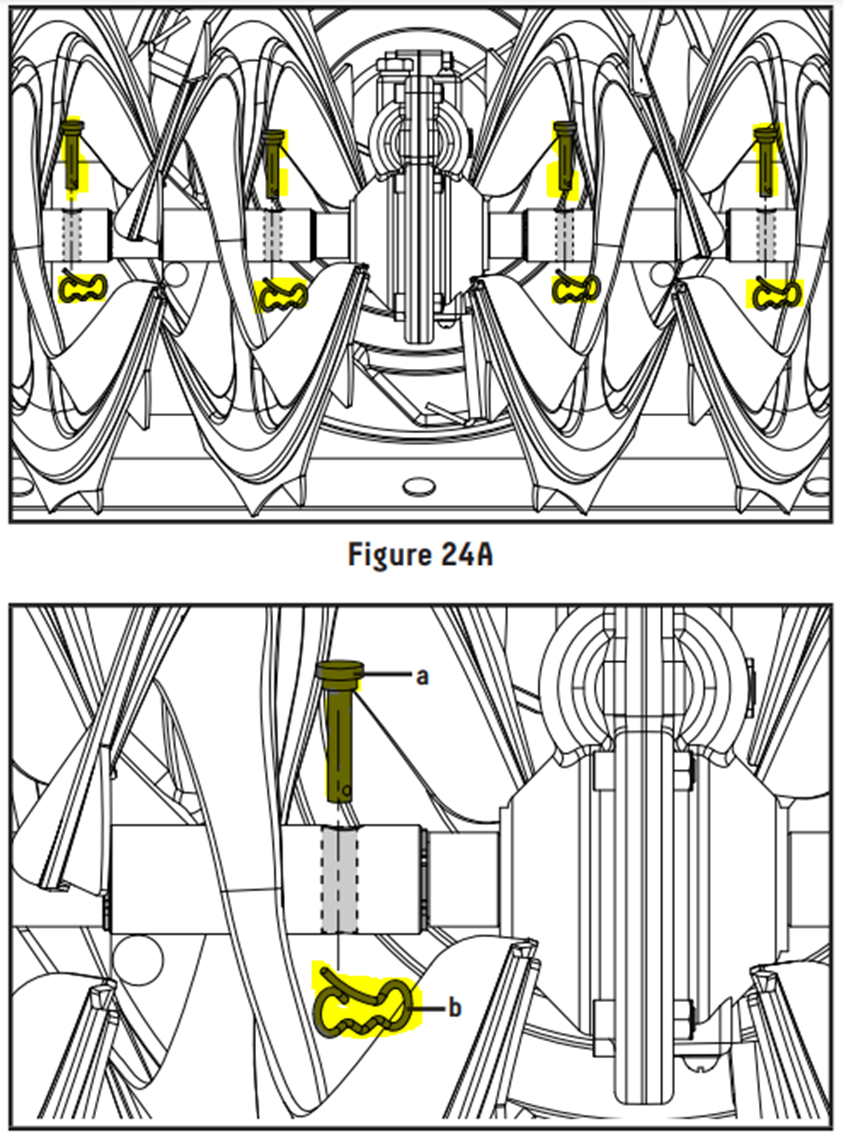
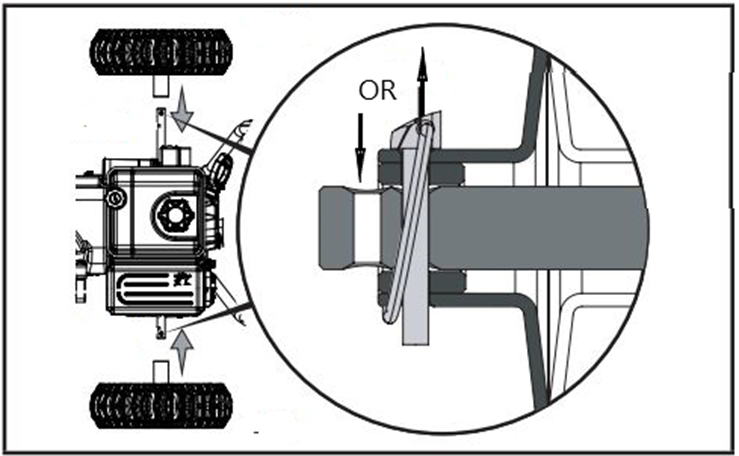
Check for missing/broken shear pins and or R-Pins.
Visual
The cables are preset by the factory. If you need to adjust, see ADJUSTING SELF-DRIVE CONTROL HANDLE CABLES or ADJUSTING AUGER CONTROL CABLE in the owner's manual for correct adjustments.
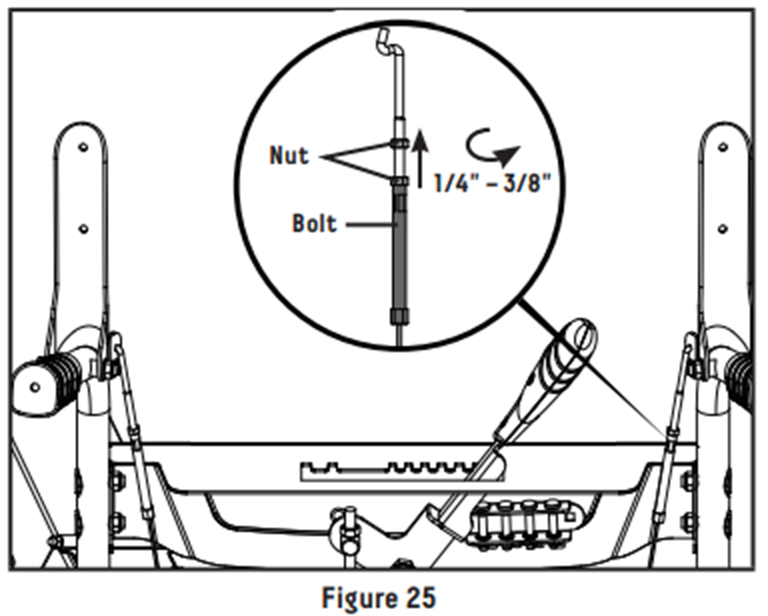
Adjusting the Self-Drive Control Handle Cable
Make sure that the tension on the self-drive cable is adjusted so it has between 1/4-3/8" (6.4-9.5 mm) of movement. This movement can be acquired by measuring the distance the engagement paddle moves from its starting position and the point it becomes taut and starts to move the transmission adjustment lever. If the slack is greater than 5/8" (16 mm), please adjust. Proper tension is important because you will want your snow blower to move forward properly in heavy snowfalls. While operating the snow blower, if the self-drive control lever is too loose, tighten the nut counterclockwise while at the same time rotating the bolt upward to reach the position of the nut (Fig. 25). Bolt Nut 1/4" – 3/8" (Fig. 25).
Visual
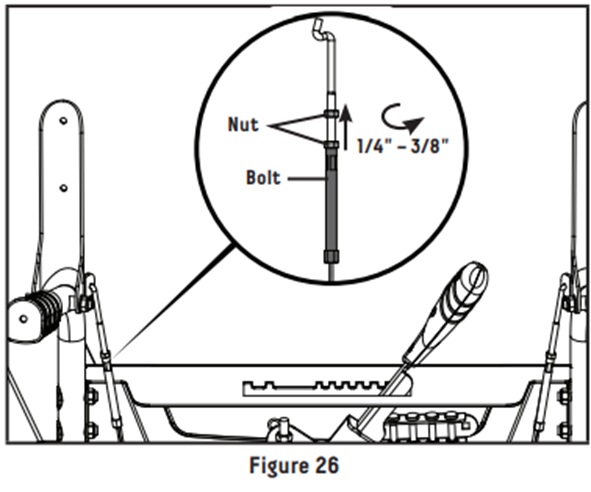
Adjusting Auger Control Cable
Make sure that the tension on the auger control cable is adjusted so it has between 1/4-3/8" (6.4-9.5 mm) of movement. This movement can be acquired by measuring the distance the engagement paddle moves from its starting position and the point it becomes taut and starts to engage the auger. If the slack is greater than 5/8" (16 mm), please adjust. Proper tension is important because you will want your snow blower to maximize belt life in heavy snowfalls. While operating the snow blower, if the auger control lever is too loose, tighten the nut counterclockwise while at the same time rotating the bolt upward to reach the position of the nut (Fig. 26).
Visual
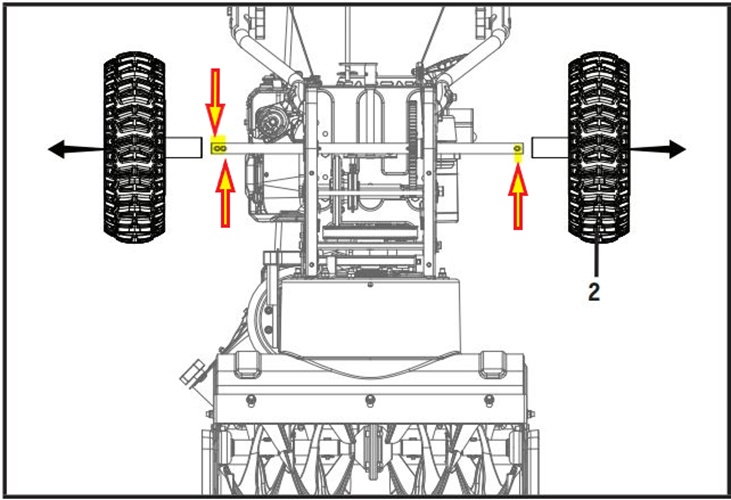
Only the left axle has two holes, and the axle pin can be removed and repositioned. If the wheel is slid further in on the axle with the pin inserted into the outside hole of the axle, the machine will move freely without the engine on. If the pin is inserted into the inside hole of the axle, the machine will only move when the drive control is engaged when the engine is on. It is optional to slide one wheel past the pin hole in the axle and to place the locking pin into the axle outside the wheel without locking it into the drive axle. This creates a pivot wheel that allows the operator to easily turn the snow blower during use by utilizing the "free wheel" as a pivot point. Though this makes turning easier, it decreases drive wheel traction by 50%.
Visual
How did we do?
Snow Blower Valve Adjustment
Snow Shoe Adjustment (Snow Blowers)