Chainsaw Chain Tension Adjustment
190626-90-50-2 This cover the following models: 100283 (16" Chainsaw), 100XXX (18" Chainsaw). Please read the instructions carefully before performing service. *Specifcations, descriptions, and illus…
Updated
by Juan Velez
190626-90-50-2
This cover the following models: 100283 (16" Chainsaw), 100XXX (18" Chainsaw).
Please read the instructions carefully before performing service.
*Specifcations, descriptions, and illustrations are as accurate as known at the time of publications but are subject to change without notice.
SAFETY PRECAUTIONS
- To reduce the risk of injury, user must read and understand the operator’s manual before using this product.
- DO NOT make any adjustments to chainsaw without first stopping the engine, making sure that all moving parts have stopped and disconnecting the spark plug wire.
- Burns from hot parts — let the unit cool for 30 minutes before touching hot parts.
- Injury from moving parts.
- To reduce the possibility of fire or explosion, be careful when working around gasoline. Keep cigarettes, sparks and flames away from all fuel‐related part.
Tools Required
Scrench (Provided with the unit) | Combination |
Heavy Work Gloves | |
Cardboard | Size of the Chainsaw |
The chainsaw should not be stored with any fuel or chain oil in its tanks. Fuel and oil should only be added to prior use.
- For a chainsaw to safely and effectively cut, the chain needs to have the proper tension. If the chain is too tight, not only will it rob the engine power due to increased friction, but the chain also runs the risk of breaking. If the chain is too loose, it can come off the bar and seriously injure the operator.
Visual
See below.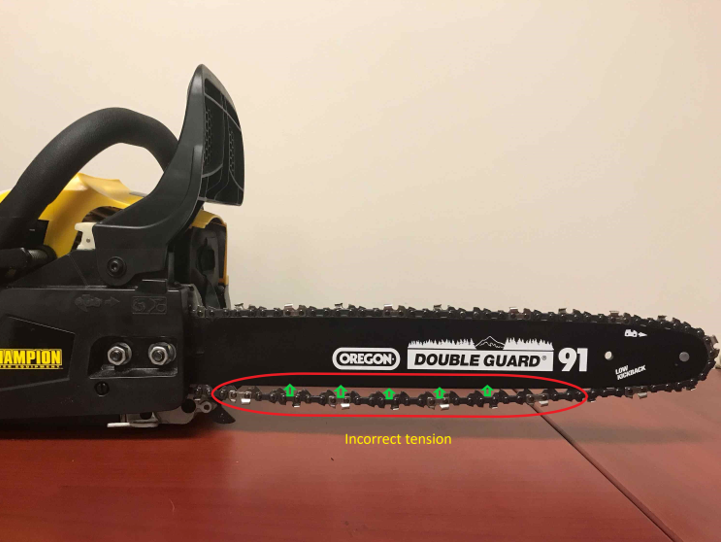
- Place the unit on a piece of cardboard. Remove the air filter cover nut (turn it counterclockwise), air filter cover, and set it aside.
Visual
See below.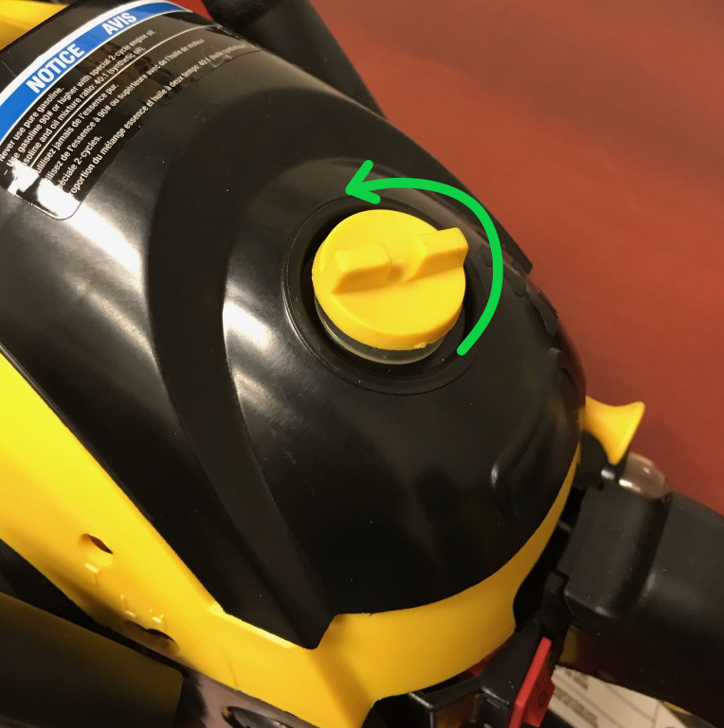
- Disconnect the spark plug lead.
Visual
See below.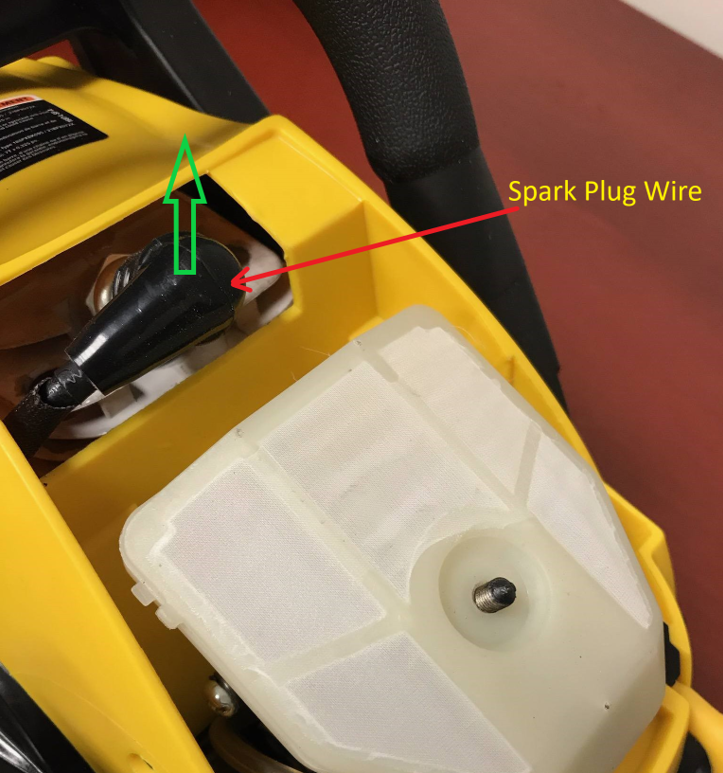
- Loosen the nuts on the chainsaw bar just enough so the bar adjustments can be made without the bar moving on its own.
Visual
See below.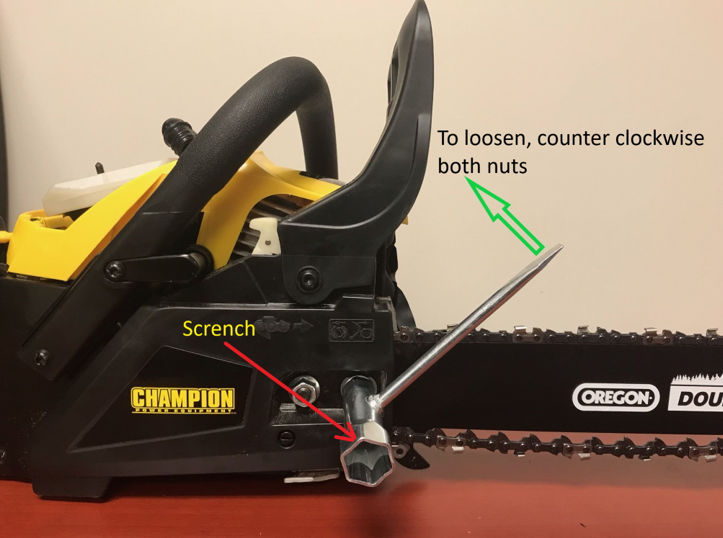
- With a pair of work gloves, hold the hose of the bar up slightly, and turn the tension screw clockwise until the slack is gone from the chain. (See picture #6.)
Note: If the adjustment screw is difficult to move, loosen the nuts on the bar (step #4) a bit more.Visual
See below.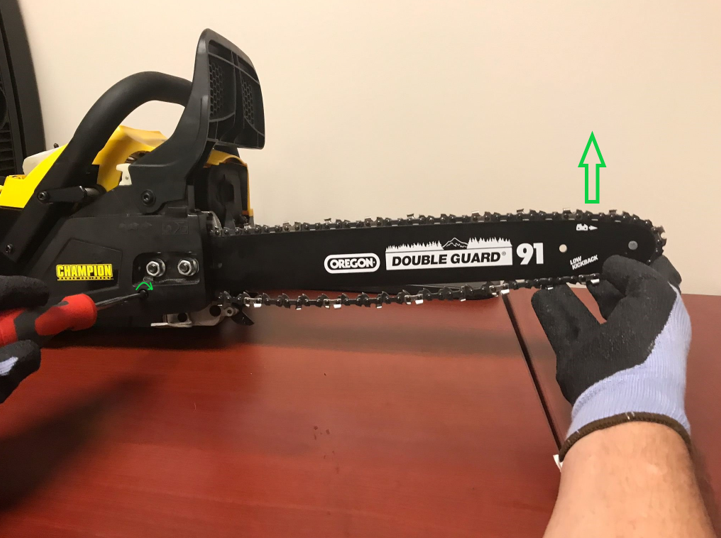
- Picture showing slack on the chain is gone.
Visual
See below.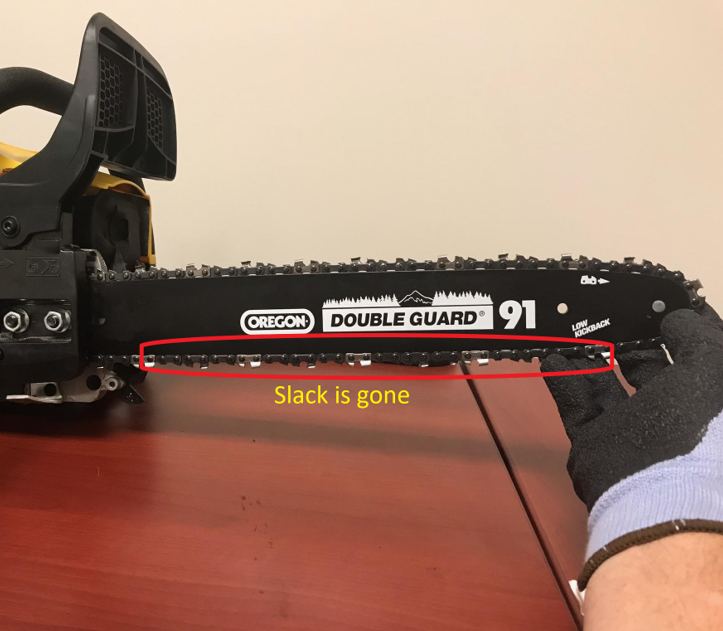
- Perform a Snap Test. While holding the chainsaw in one hand, grasp the chain along the top center of the chainsaw's bar with two fingers of your free hand. (Always wear heavy gloves and protective eyewear when performing this test.) Lift the chain away from the bar and then quickly release it. A properly tensioned chain will rapidly snap back into position around the top of the bar and show no signs of sagging along the bottom of the bar as shown in picture #1.
Visual
See below.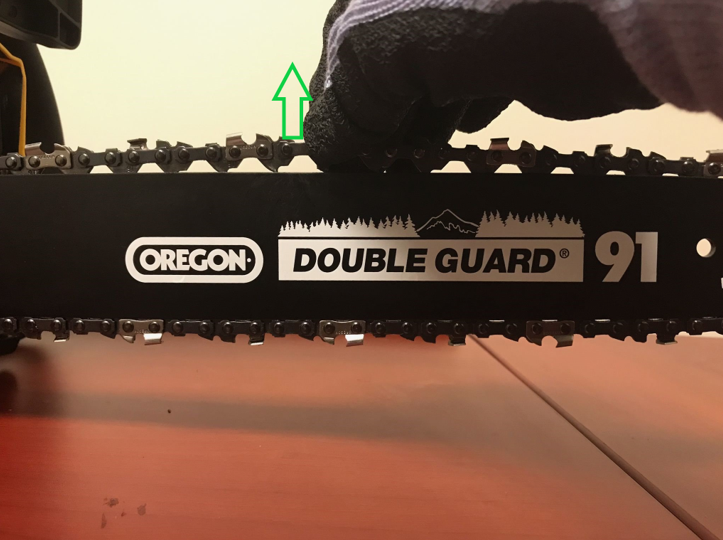
- While always wearing heavy work gloves, grasp the chain and pull it towards the nose of the chainsaw to ensure that the chain moves freely. A properly tensioned chain should still be a little loose on the chainsaw guide bad, but the chain needs to be tight enough that you cannot pull the drive links out of the bar nose.
Visual
See below.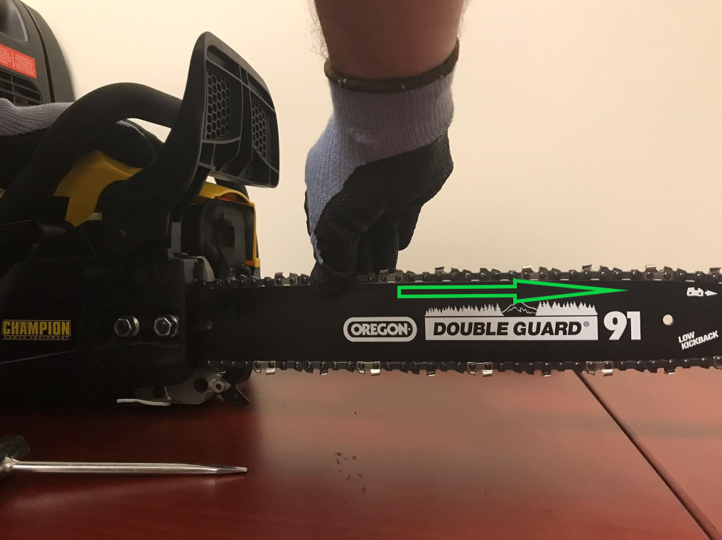
- Tighten the two nuts on the chainsaw bar. If using a torque wrench, tighten the nuts to 15 ft-lb. or 20.33 Nm. Replace the spark plug lead and replace the air filter cover housing.
- For bar oil flow adjustment, please to Technical Bulletin 190627-90-50-2 Chainsaw Oil Flow Adjustment.
How did we do?
Chainsaw Setup and Startup
Chainsaw Oil Flow Adjustment