High Altitude Jet Installation (717cc Engines)
This bulletin covers the following Champion Power Equipment models: All Champion Power Equipment products instilled with a 717cc gasoline-powered engine. Please read the instructions completely and c…
Updated
by Juan Velez
This bulletin covers the following Champion Power Equipment models: All Champion Power Equipment products instilled with a 717cc gasoline-powered engine.
Please read the instructions completely and carefully before performing the service.
SAFETY PRECAUTIONS
- To reduce the risk of injury, user must read and understand the operator’s manual before using this product.
- DO NOT make any adjustments to the product without first stopping the engine and disconnecting the spark plug wire.
- Burns from hot parts — let the engine cool completely before touching hot parts.
- Injury from moving parts
- To reduce the possibility of fire or explosion, be careful when working around gasoline. Keep cigarettes, sparks and flames away from all fuel‐related parts.
- Unlock fasteners (1) by rotating them 90 degrees to the counterclockwise position. Remove the air cleaner cover (2) by pulling it forward.
Visual
See below.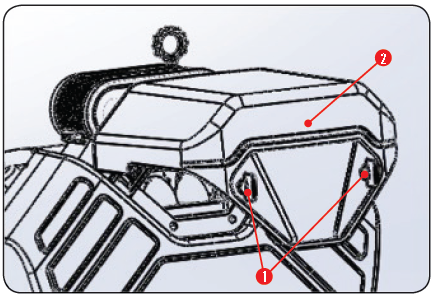
- Remove the air filter (3).
Visual
See below.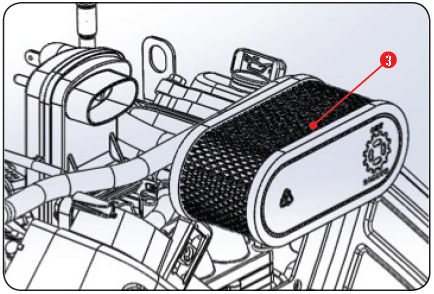
- Loosen the fuel hose clamp (4) and remove the fuel hose (5). Loosen the breather tube clamp (6) and then remove the breather tube (7).
Visual
See below.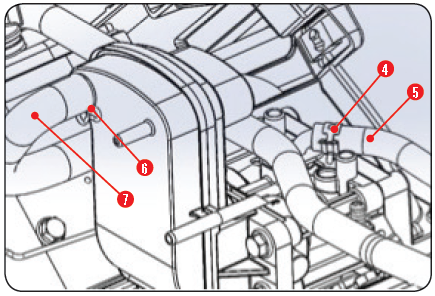
- Disconnect the taking-up spring (9) and remove the governor link (8) and from the carburetor throttle lever.
Visual
See below.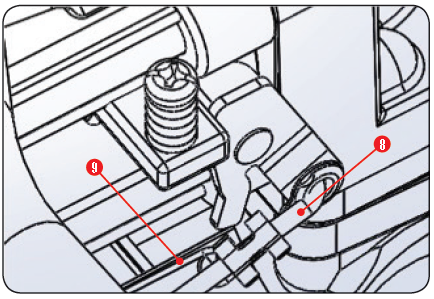
- Disconnect the choke link (10) from the control arm by pulling up on the retaining clip (11), and then remove the choke link from the carburetor choke lever.
Visual
See below.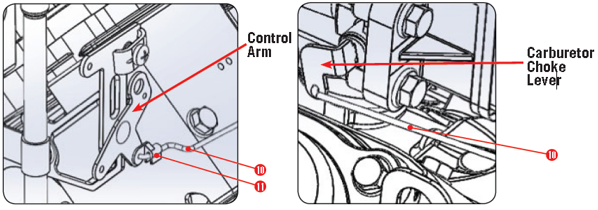
- Disconnect the wire harness connector (12) from the carburetor fuel-cut solenoid.
Visual
See below.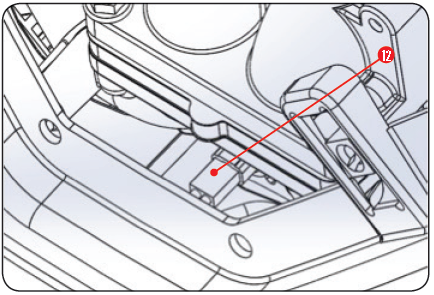
- Remove the bolts (13). Slide back the air cleaner elbow (14), gasket (15), and carburetor (16).
Visual
See below.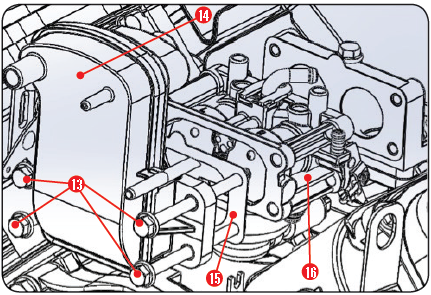
- Remove the float bowl screws (17). Lift the float bowl (18) straight away from the carburetor body.
Visual
See below.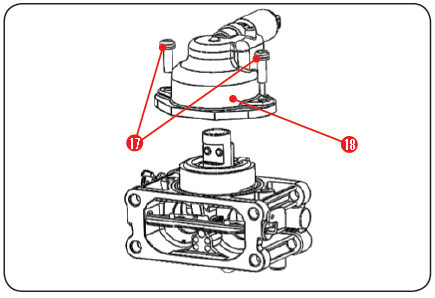
- Remove the float assembly (18) and the o-ring (21) from the carburetor body.
Visual
See below.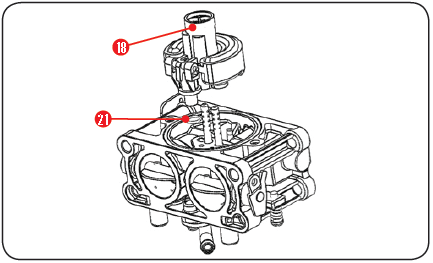
- Remove the o-ring (22) from the float assembly (18).
Visual
See below.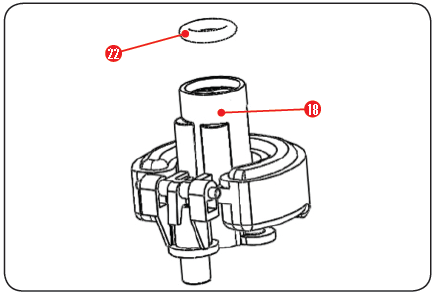
- Remove the main jet assemblies (23) by pushing them out from the top side of the float assembly (18) using a suitable rod such as 1/8" pin punch for jet removal.
Visual
See below.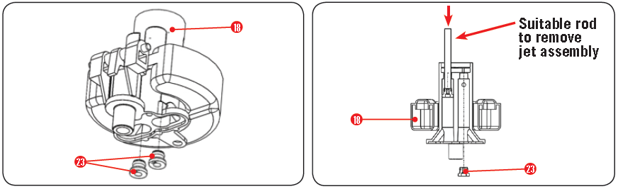
- Insert the high altitude jet assemblies (24) from the bottom side of the float assembly (18). Using a suitable rod such as a 1/8" pin punch, press the jets until they are flush with a float assembly surface.
Visual
See below.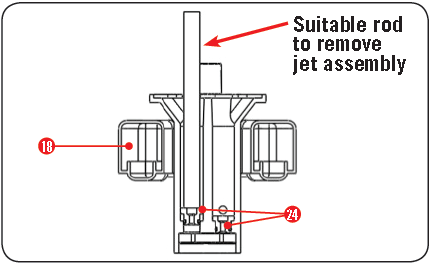
- Install o-ring (22) and gasket (25) into the float assembly (18).
Visual
See below.
- Install the o-ring (26) to the carburetor body.
Visual
See below.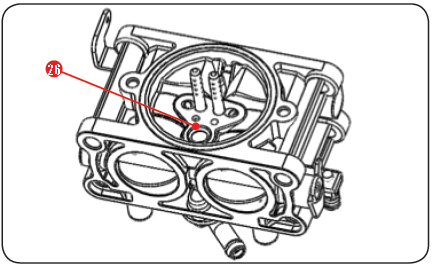
- Install the float assembly (18) to the carburetor body.
Visual
See below.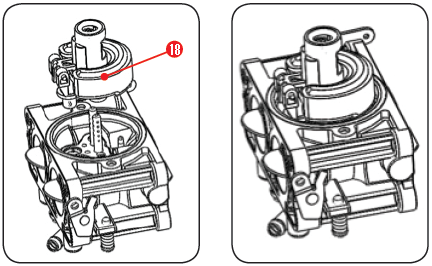
- Install the float bowl (17) to the carburetor body; tighten the screws (16) to a torque of 3.9 Nm (25 in.-lb.).
Visual
See below.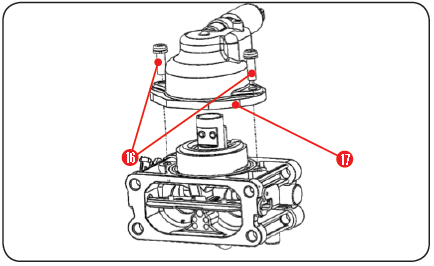
- Reassemble the carburetor/float bowl assembly onto the engine in reverse order of steps seven to one. Torque the carburetor/air cleaner elbow bolts (12) to 9 Nm (78 in.-lb.).
View and download the PDF version here.
How did we do?
Basic Engine Diagnostics
Fuel Flow Test, Carburetor Jet Service Procedures