Fuel Tank Replacement (3100-watt Inverters)
![]() Updated
by
Juan Velez
Updated
by
Juan Velez
This bulletin covers the following models: Champion 3100-watt inverters.
Read instructions carefully and completely before performing service.
SAFETY PRECAUTIONS
- To reduce the risk of injury, user must read and understand the operator’s manual before using this product.
- DO NOT make any adjustments to the generator without first stopping the engine and disconnecting the spark plug wire.
- Burns from hot parts — let the engine cool completely before touching hot parts.
- Injury from moving parts
- To reduce the possibility of fire or explosion, be careful when working around gasoline. Keep cigarettes, sparks and flames away from all fuel‐related parts.
- Remove the three screws along both the right and left handles. This will allow you to snap these handle pieces out. Do not forget to remove the gas cap. Remove the 10 mm bolts and set them aside the top yellow cover.
Visual
See below.
- Remove the maintenance panel and locate the fuel drain hose. Place the fuel drain hose into a safe fuel storage container and loosen the drain screw. Turn the fuel valve on to drain the gas from the tank.
Visual
See below.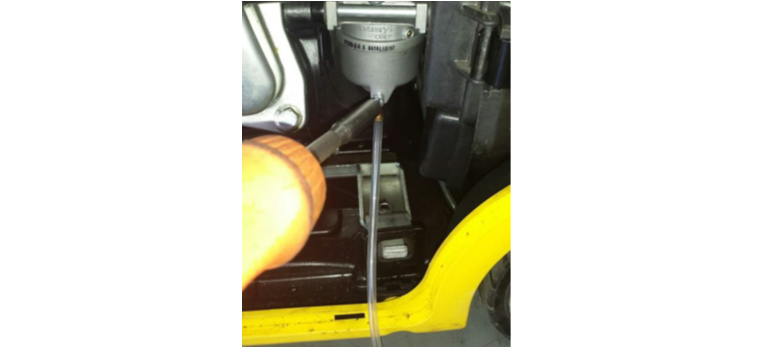
- Nest, remove the rubber ventilation hose that can be seen from the top of the fuel tank as well as the fuel line from the fuel "ON/OFF" valve.
Visual
See below.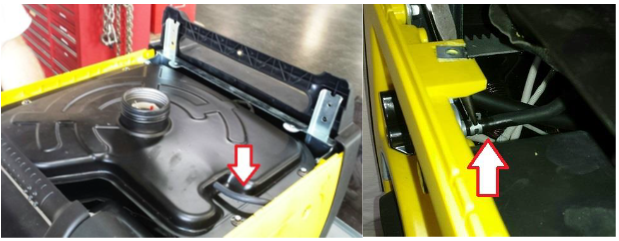
- With the hoses disconnected, you can remove the 7 mm fuel tank bolts and set the existing fuel tank aside. Replace with the new fuel tank and reverse these steps to complete the installation.
View and download the PDF version here.