23cc Handheld Leaf Blower Carburetor & Gasket Replacement
This bulletin covers the following Champion Power Equipment models: 100734. Please read and view the following instructions carefully and completely before performing the service. SAFETY PRECAUTIONS.…
Updated
by Juan Velez
This bulletin covers the following Champion Power Equipment models: 100734.
Please read and view the following instructions carefully and completely before performing the service.
SAFETY PRECAUTIONS
- To reduce the risk of injury, user must read and understand the operator’s manual before using this product.
- DO NOT make any adjustments to leaf blower without first stopping the engine, making sure that all moving parts have stopped and disconnecting the spark plug wire.
- Burns from hot parts — let the product cool for 30 minutes before touching hot parts.
- Injury from moving parts.
- To reduce the possibility of fire or explosion, be careful when working around gasoline. Keep cigarettes, sparks, and flames away from all fuel‐related part.
Tools Required
Tool | Size |
Phillips Screwdriver | #2 |
Hex Bit | 4 mm or 5/32" |
Never store the machine with gasoline in the fuel tank in a confined area with improper ventilation. Gasoline fumes could reach open flames, sparks, and cigarettes etc.
- Locate the insulated spark plug connector found on the recoil side of the engine on the top of the unit. Grasp firmly the rubber at each end and pull up. Remove the spark plug with the scrench (spark plug wrench) provided with your unit.
Visual
See below.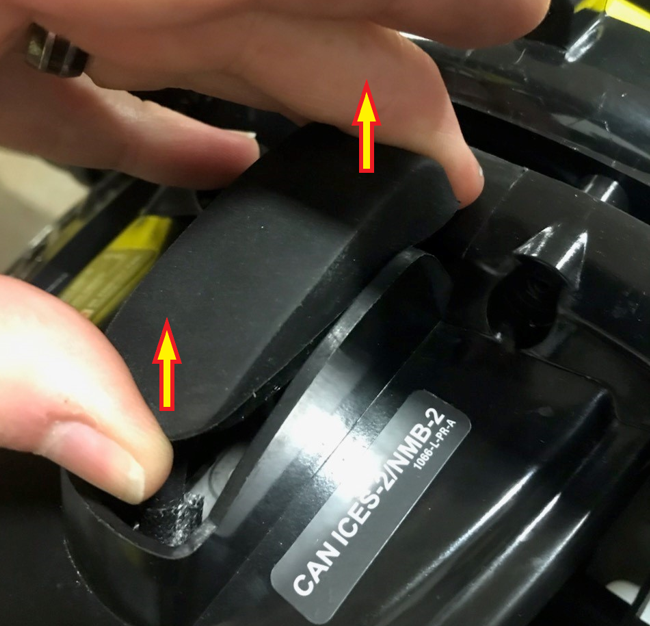
- Move choke lever into the run position and remove the air cleaner cover by turning the cover fastener counterclockwise. Brush away any accumulated dirt from the air filter cover area.
Visual
See below.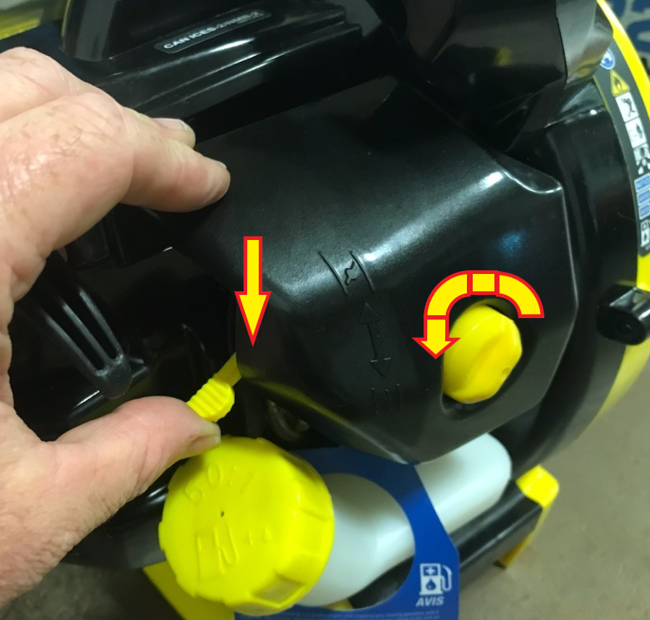
- Remove the two M5 x 25 carburetor screws with a 4 mm or 5/32" hex bit.
Visual
See below.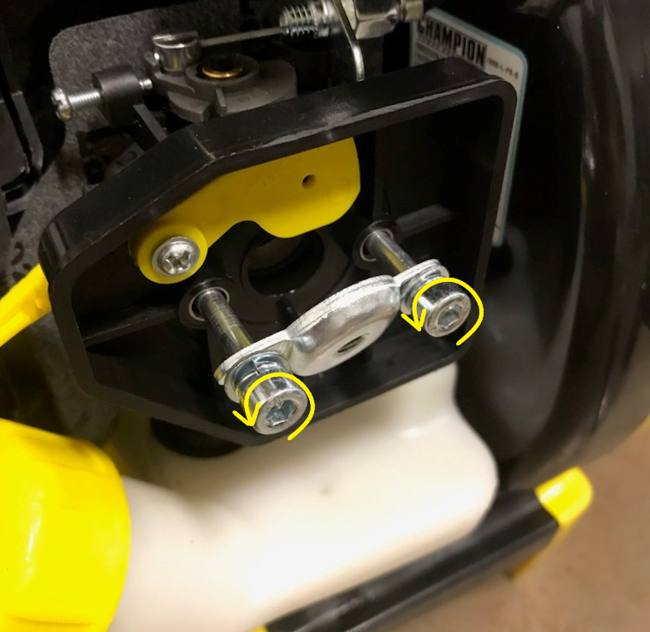
- Gently slide the carburetor away and remove the following gasket.
Visual
See below.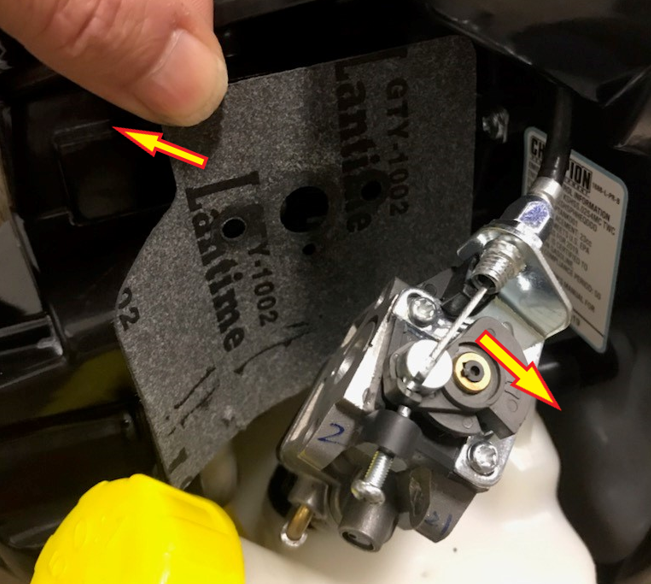
- Firmly grasp the throttle plate as shown and turn clockwise to disengage the throttle cable from the cable retainer.
Visual
See below.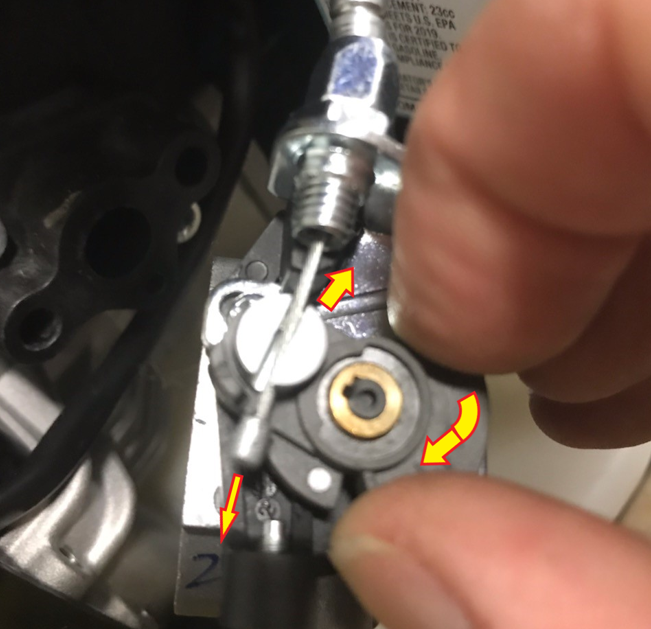
- Remove the cable from the retainer.
Visual
See below.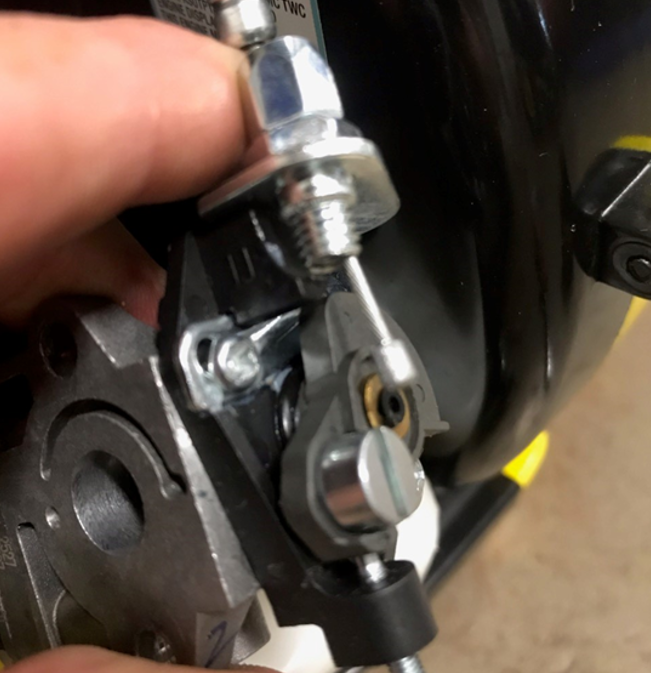
- Turn the carburetor on its side and remove the fuel supply and fuel return tube. (Tubes are of different diameters to prevent confusion when reconnecting.)
Visual
See below.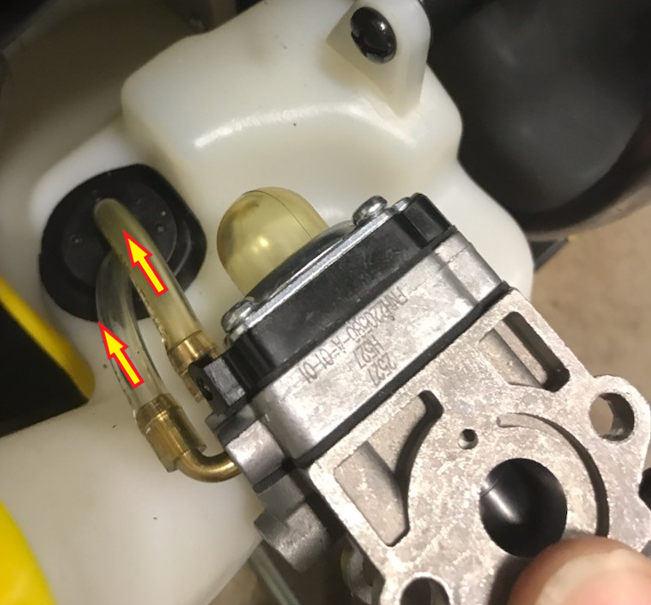
- Once the old carburetor has been removed, reconnect the fuel supply, and fuel return tubes, ensuring they are firmly connected. Follow the instructions going from #6 through to #4 and when installing the M5 x 25 carburetor screws, make sure that you have properly aligned the gasket. Insert the screws carefully into the Admitting Pipe, as to not cross thread. Check for any fuel leaks, reinstall the spark plug and insulator.
How did we do?
23cc Handheld Leaf Blower Gas Tank Replacement
Leaf Blower Assembly and Operation (200934)