Certified Snow Blower Spherical Bearing Replacement
190513-140-50-1 This bulletin covers the following models: 100435 (060-3732-6), 100566 (060-3740-6), 100567 (060-3742-2), and 100568 (060-3744-8). SAFETY PRECAUTIONS. To reduce the risk of injury, th…
Updated
by Juan Velez
190513-140-50-1
This bulletin covers the following models: 100435 (060-3732-6), 100566 (060-3740-6), 100567 (060-3742-2), and 100568 (060-3744-8).
SAFETY PRECAUTIONS
- To reduce the risk of injury, the user must read and understand the operator's manual before using this product.
- DO NOT make any adjustments to the snowblower without first stopping the engine, removing the engine key, and disconnecting the spark plug wire.
- Burns from hot parts - let the engine cool for 30 minutes before touching hot parts.
- Injury from moving parts - this machine may pick up and throw objects which can cause serious personal injury. Keep bystanders at a safe distance.
- To reduce the possibility of fire or explosion, be careful when working around gasoline. Keep cigarettes, sparks, and flames away from all fuel-related parts.
- DO NOT run the engine with the belt guard removed.
Tools Needed: Ratchet, extension, sockets (size 10mm, 12mm and 13mm), Adjustable wrench, needle nose pliers, size 3mm Hex bit with bit holder driver, elastic band.
- Remove the plastic belt cover on the front of the engine by removing the two M6 x 16 bolts with a 10 mm socket.
Visual
See below.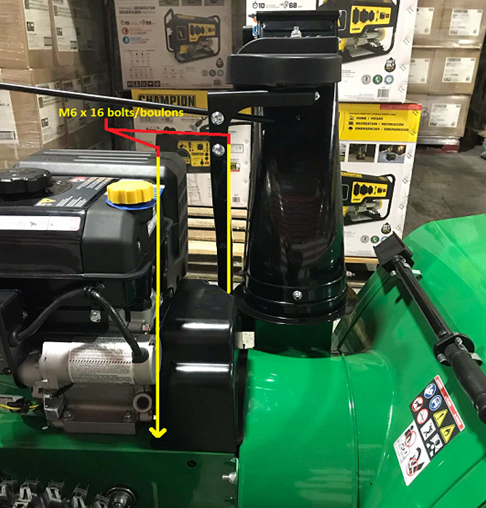
- Pull out the R-Pin and then remove the lever.
Visual
See below.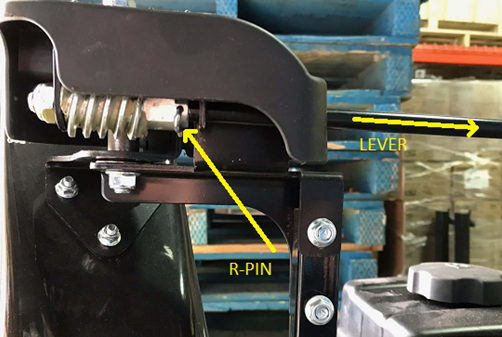
- Unscrew the nut of the auger control wire.
Visual
See below.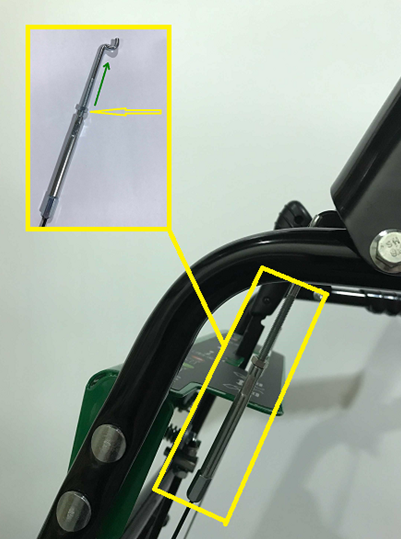
- Remove the #1 bolt (20 mm/ 30 mm) holding the belt guard with the 12 mm socket and loosen the #2 bolt. Note the spring is loose at this point. Be careful not to lose the fitted spacer washer (#3).
Visual
See below.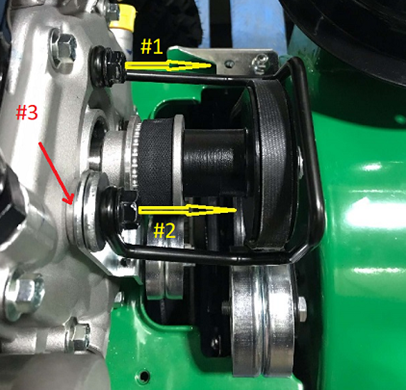
- Unscrew and remove the 6 x M8 nuts to separate the auger housing from the base with the 12 mm socket. (Image shows the top pulley removed.)
Visual
See below.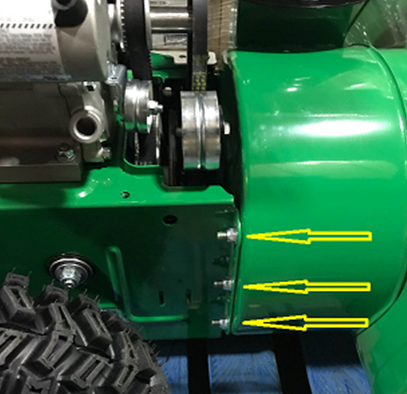
- Loosen the M8 flange locking nut on the belt guard with a 12 mm socket, and push the tension wheel and lever to remove the belt as shown with the arrows.
Visual
See below.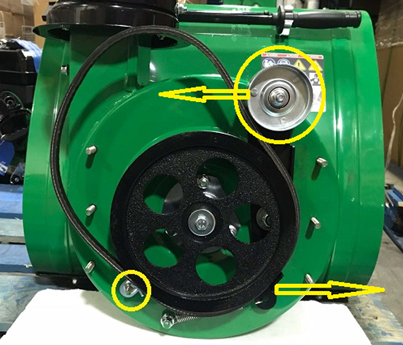
- Slip the auger belt off the pulley. Remove and replace the belt in reverse order, ensuring that the new belt is below the spring-loaded idler pulley. Lose the 6 x M8 x 16 flange bolts with the 12 mm socket (three on each side of the big housing assembly) holding the worm gear box assembly.
Visual
See below.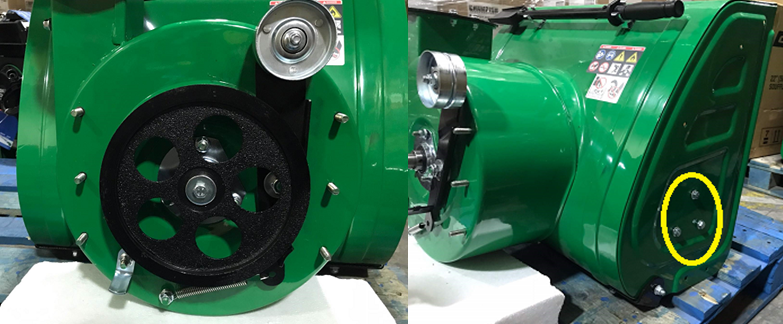
- Unscrew the center M8 x 25 hexagon bolt on the big triangle pulley with a 13 mm socket and remove it. Be careful not to lose the 6 x 6 x 15 flat key. Once removed, unscrew the 3 x M8 flange bolts with a 12 mm socket holding the pressing plate bearing in place.
Visual
See below.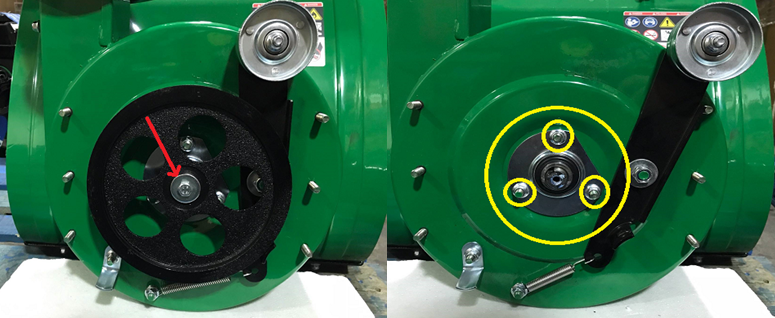
- Remove the existing spherical bearing and replace it with a new spherical bearing with the set of screws and pressing plate.
Visual
See below.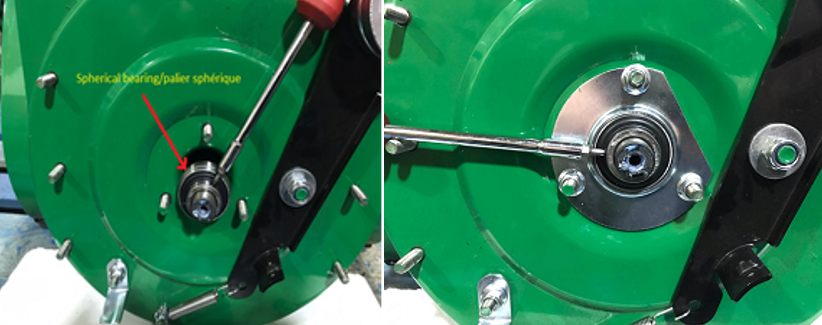
- While pushing in on the worm gear box assembly from the front, tighten the 6 x M8 x 16 flange bolts (three on each side) of the big housing assembly. Tighten the set screws on the spherical bearing with the 3 mm hex bit and replace the pressing plate.
Visual
See below.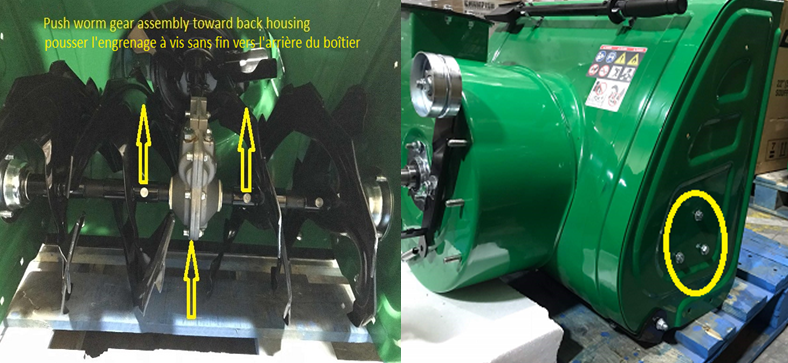
- Replace the big triangle pulley center bolt with the 12 mm socket and belt. (Use a rubber band to secure the auger belt in place for assembly.)
Visual
See below.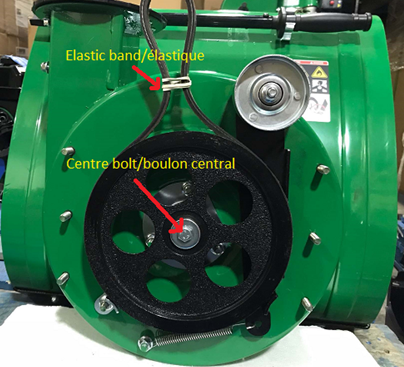
- Reassemble the unit by following the instructions in reverse order from steps five to one.
How did we do?
High Altitude Jet Installation (Snow Blowers)
Snow Blower Cable Adjustment (100535, 100536)